
This tutorial explains how to build a review system using PHP, MySQL, and AJAX. A review system lets users share opinions and experiences about your products or services.
You can add this review system to any webpage, including static HTML files. We will use AJAX to get the reviews from a PHP server. The system knows which reviews to show based on the user's current page.
AJAX makes the system fast and smooth. It updates the reviews without reloading the entire page. This creates a much better experience for your users.
Implementation is straightforward if you have PHP and MySQL installed on your server. This makes adding the review system to your website easy.
The Advanced package includes additional features and a download link to the source code.
Contents
Prerequisites
Before you start, make sure you have a basic understanding of HTML, CSS, PHP, and SQL. You will also need a web server environment.
- A local server like XAMPP or a live web server.
- PHP and MySQL installed and running.
- A text editor for coding.
1. Getting Started
If you want to install the review system on your local environment, you must install a webserver solution. Follow the below instructions.
- Install a webserver solution package such as XAMPP.
- If you have your own server (VPS, Dedicated, etc.), you'll need to install PHP, Apache, MySQL, and phpMyAdmin (Note: these are already included with XAMPP).
- Install a code editor. You can use Notepad, but I don't recommend it. Install one of the following instead: Visual Studio Code or Notepad++.
2. Creating the Database and setting-up Tables
First, we will create a MySQL database and a table for the reviews. We can do this using phpMyAdmin.
Navigate to phpMyAdmin (e.g. localhost/phpmyadmin/) in your browser and follow the below instructions:
- Click the Databases tab at the top
- Under Create database, type in phpreviews in the text box
- Select utf8mb4_unicode_ci as the collation (UTF-8 is the default encoding in HTML5)
- Click Create
While the database is selected, click the SQL tab and execute the following SQL statement:
CREATE TABLE IF NOT EXISTS `reviews` (
  `id` int(11) NOT NULL AUTO_INCREMENT,
  `page_id` int(11) NOT NULL,
  `display_name` varchar(255) NOT NULL,
  `content` mediumtext NOT NULL,
  `rating` tinyint(1) NOT NULL,
  `submit_date` datetime NOT NULL DEFAULT current_timestamp(),
  PRIMARY KEY (`id`)
) ENGINE=InnoDB AUTO_INCREMENT=15 DEFAULT CHARSET=utf8mb4 COLLATE=utf8mb4_unicode_ci;

INSERT INTO `reviews` (`id`, `page_id`, `display_name`, `content`, `rating`, `submit_date`) VALUES
(1, 1, 'David Smith', 'I use this website daily, the amount of content is brilliant.', 5, '2025-01-09 20:43:02'),
(2, 1, 'John Doe', 'Great website, great content, and great support!', 4, '2025-01-09 21:00:41'),
(3, 1, 'Robert Billings', 'Website needs more content, good website but content is lacking.', 3, '2025-01-09 21:10:16'),
(4, 1, 'Daniel Jones', 'Would definitely recommend... Valuable content and great community.', 5, '2025-01-09 23:51:05'),
(5, 1, 'Karl Higgs', 'Not much content.', 2, '2025-01-07 21:54:24'),
(6, 1, 'Joshua Kennedy', 'Fantasic website, has everything I need to know.', 5, '2025-01-07 17:34:27'),
(7, 1, 'Johannes Hansen', 'Really like this website, helps me out a lot!', 5, '2025-01-05 17:35:12'),
(8, 1, 'Wit Kwiatkowski', 'Please provide more quality content.', 3, '2025-01-05 17:36:03'),
(9, 1, 'Óli Þórðarson', 'Thanks', 5, '2025-01-05 17:36:34'),
(10, 1, 'Jaroslava Beránková', '', 5, '2025-01-01 17:37:48'),
(11, 1, 'Naomi Holt', 'Appreciate the amount of content you guys do.', 5, '2025-01-01 17:39:17'),
(12, 1, 'Isobel Whitehead', 'Thank you for providing a website that helps us out a lot!', 5, '2025-01-01 17:40:28'),
(13, 1, 'Warren Mills', 'Everything is awesome!', 5, '2025-01-01 19:34:08'),
(14, 1, 'Larry Johnson', 'Brilliant, thank you for providing quality content!', 5, '2025-01-01 18:40:36');
The data that we insert into the reviews table will be for testing purposes.
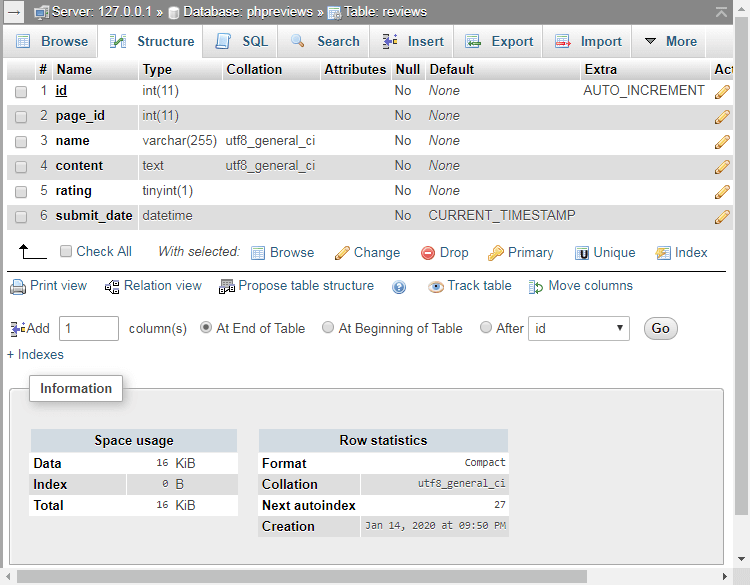
The above SQL statement will create the reviews table with the following columns:
- id — The unique review ID.
- page_id — This will determine which review is for which page. It will be the page ID that you can specify on any webpage.
- display_name — The name of the user (e.g. Joe Bloggs).
- content — The review content that the user will submit via the form.
- rating — The review rating that will be from 1 to 5.
- submit_date — The date the review was posted.
In phpMyAdmin, this should resemble:
3. Creating the Stylesheets (CSS3)
Next, we will create two CSS files. One styles the homepage and the other styles the review system itself.
Stylesheets are used to format the layout of our review system.
Create the style.css file and add:
* {
  box-sizing: border-box;
  font-family: system-ui, "Segoe UI", Roboto, Helvetica, Arial, sans-serif, "Apple Color Emoji", "Segoe UI Emoji", "Segoe UI Symbol";
  font-size: 16px;
}
body {
  background-color: #FFFFFF;
  margin: 0;
}
.navtop {
  background-color: #28303d;
  height: 60px;
  width: 100%;
  border: 0;
}
.navtop div {
  display: flex;
  align-items: center;
  margin: 0 auto;
  width: 800px;
  height: 100%;
}
.navtop div h1 {
  display: inline-flex;
  align-items: center;
  font-size: 18px;
  padding: 0;
  margin: 0;
  color: #fff;
  font-weight: 500;
}
.navtop div h1 span {
  background-color: #818891;
  border-radius: 5px;
  padding: 2px 6px;
  margin-left: 8px;
  font-size: 12px;
  font-weight: 500;
}
.content {
  width: 100%;
  max-width: 800px;
  margin: 0 auto;
}
.content > h2 {
  margin: 0;
  padding: 35px 0 20px 0;
  font-size: 26px;
  font-weight: 600;
  color: #666666;
}
.content > p {
  font-size: 16px;
  line-height: 1.6;
  margin: 0;
  padding: 15px 0;
  color: #666666;
}
Create the reviews.css file and add:
.reviews .overall-rating {
  display: flex;
  align-items: center;
  gap: 15px;
  padding-bottom: 25px;
}
.reviews .overall-rating .num {
  font-size: 30px;
  font-weight: bold;
  color: #F5A624;
}
.reviews .overall-rating .stars {
  display: flex;
  gap: 3px;
}
.reviews .overall-rating .stars svg {
  fill: #F5A624;
}
.reviews .overall-rating .stars svg.alt {
  fill: #e9eaf1;
}
.reviews .overall-rating .total {
  color: #87888d;
  font-size: 14px;
}
.reviews .write-review-btn, .reviews .write-review button {
  display: inline-flex;
  align-items: center;
  justify-content: center;
  appearance: none;
  border: 0;
  cursor: pointer;
  font-weight: 500;
  font-size: 14px;
  padding: 0 16px;
  height: 36px;
  background-color: #3b3c3f;
  color: #ffffff;
  text-decoration: none;
  border-radius: 5px;
  box-shadow: 0 0 6px 1px rgba(20, 24, 31, 0.1);
}
.reviews .write-review-btn:hover, .reviews .write-review button:hover {
  background-color: rgb(38.6142857143, 39.3714285714, 40.8857142857);
}
.reviews .write-review {
  display: none;
  padding: 20px 0 30px 0;
}
.reviews .write-review textarea {
  width: 100%;
  padding: 10px;
  border: 1px solid #ddd;
  border-radius: 5px;
  height: 150px;
  margin-top: 15px;
}
.reviews .write-review input {
  display: block;
  width: 250px;
  padding: 10px;
  border: 1px solid #ddd;
  border-radius: 5px;
  margin-top: 15px;
}
.reviews .write-review button {
  margin-top: 15px;
  cursor: pointer;
}
.reviews .reviews-wrapper {
  padding: 20px 0;
}
.reviews .review {
  padding: 15px 0;
}
.reviews .review .name {
  padding: 0 0 3px 0;
  margin: 0;
  font-size: 18px;
  color: #5e5f63;
}
.reviews .review .rating-wrapper {
  display: flex;
  align-items: center;
  gap: 10px;
  padding: 10px 0;
}
.reviews .review .rating {
  display: flex;
  gap: 3px;
}
.reviews .review .rating svg {
  fill: #F5A624;
}
.reviews .review .rating svg.alt {
  fill: #e9eaf1;
}
.reviews .review .date {
  color: #87888d;
  font-size: 14px;
}
.reviews .review .content {
  color: #464649;
  padding: 5px 0;
}
Make sure both files are in the same folder as the index.html and reviews.php files. You can inspect the browser console to see any errors.
4. Creating the Review System with PHP
Now we can write the PHP code for our review system. This script will get reviews from the database and display them as HTML.
Create the reviews.php file and add:
<?php
// Update the details below with your MySQL details
$DATABASE_HOST = 'localhost';
$DATABASE_USER = 'root';
$DATABASE_PASS = '';
$DATABASE_NAME = 'phpreviews';
// Try and connect using the info above
try {
    $pdo = new PDO('mysql:host=' . $DATABASE_HOST . ';dbname=' . $DATABASE_NAME . ';charset=utf8mb4', $DATABASE_USER, $DATABASE_PASS);
} catch (PDOException $exception) {
    // If there is an error with the connection, stop the script and display the error.
    exit('Failed to connect to database!');
}
This code connects to your MySQL database. Make sure the database variables match your credentials to avoid connection errors.
Add after:
// Below function will convert datetime to time elapsed string.
function time_elapsed_string($datetime, $full = false) {
    $now = new DateTime;
    $ago = new DateTime($datetime);
    $diff = $now->diff($ago);
    $w = floor($diff->d / 7);
    $diff->d -= $w * 7;
    $string = ['y' => 'year','m' => 'month','w' => 'week','d' => 'day','h' => 'hour','i' => 'minute','s' => 'second'];
    foreach ($string as $k => &$v) {
        if ($k == 'w' && $w) {
            $v = $w . ' week' . ($w > 1 ? 's' : '');
        } else if (isset($diff->$k) && $diff->$k) {
            $v = $diff->$k . ' ' . $v . ($diff->$k > 1 ? 's' : '');
        } else {
            unset($string[$k]);
        }
    }
    if (!$full) $string = array_slice($string, 0, 1);
    return $string ? implode(', ', $string) . ' ago' : 'just now';
}
This function formats the review date. It converts a timestamp like "2025-01-09 20:43:02" into "3 weeks ago." This shows how recently a review was posted.
Add after:
// Page ID needs to exist, this is used to determine which reviews are for which page.
if (isset($_GET['page_id'])) {
    // Get all reviews by the Page ID ordered by the submit date
    $stmt = $pdo->prepare('SELECT * FROM reviews WHERE page_id = ? ORDER BY submit_date DESC');
    $stmt->execute([$_GET['page_id']]);
    $reviews = $stmt->fetchAll(PDO::FETCH_ASSOC);
    // Get the overall rating and total amount of reviews
    $stmt = $pdo->prepare('SELECT AVG(rating) AS overall_rating, COUNT(*) AS total_reviews FROM reviews WHERE page_id = ?');
    $stmt->execute([$_GET['page_id']]);
    $reviews_info = $stmt->fetch(PDO::FETCH_ASSOC);
} else {
    // If the page ID is not set, output an error
    exit('Please provide the page ID!');
}
?>
The code uses a GET request to get the page ID. It then fetches all reviews for that page from the database. The reviews are sorted by date, with the newest first.
We also need to calculate the average rating for all reviews. A separate query uses the MySQL AVG() function for the average rating. The COUNT() function gets the total number of reviews.
Also, prepared statements are used to prevent SQL injection, which makes the code more secure and protects your database from attacks.
After this line:
if (isset($_GET['page_id'])) {Add:
// If the form has been submitted
if (isset($_POST['name'], $_POST['rating'], $_POST['content'])) {
    // Insert a new review (user submitted form)
    $stmt = $pdo->prepare('INSERT INTO reviews (page_id, display_name, content, rating, submit_date) VALUES (?,?,?,?,?)');
    $stmt->execute([ $_GET['page_id'], $_POST['name'], $_POST['content'], $_POST['rating'], date('Y-m-d H:i:s') ]);
    // Output success message
    exit('Your review has been submitted!');
}
What this will do is insert a new review into our reviews table in our database, but only if the user has submitted the "write review" form, as this form will contain fields for name, rating, and content, which can then subsequently be retrieved with the $_POST variable.
At the very end of the file, add (just after the PHP closing tag):
<div class="overall-rating">
<span class="num"><?=number_format($reviews_info['overall_rating'], 1)?></span>
<span class="stars">
<?=str_repeat('<svg width="26" height="26" xmlns="http://www.w3.org/2000/svg" viewBox="0 0 640 640"><!--!Font Awesome Free v7.0.0 by @fontawesome - https://fontawesome.com License - https://fontawesome.com/license/free Copyright 2025 Fonticons, Inc.--><path d="M341.5 45.1C337.4 37.1 329.1 32 320.1 32C311.1 32 302.8 37.1 298.7 45.1L225.1 189.3L65.2 214.7C56.3 216.1 48.9 222.4 46.1 231C43.3 239.6 45.6 249 51.9 255.4L166.3 369.9L141.1 529.8C139.7 538.7 143.4 547.7 150.7 553C158 558.3 167.6 559.1 175.7 555L320.1 481.6L464.4 555C472.4 559.1 482.1 558.3 489.4 553C496.7 547.7 500.4 538.8 499 529.8L473.7 369.9L588.1 255.4C594.5 249 596.7 239.6 593.9 231C591.1 222.4 583.8 216.1 574.8 214.7L415 189.3L341.5 45.1z"/></svg>', round($reviews_info['overall_rating']))?>
<?=str_repeat('<svg class="alt" width="26" height="26" xmlns="http://www.w3.org/2000/svg" viewBox="0 0 640 640"><!--!Font Awesome Free v7.0.0 by @fontawesome - https://fontawesome.com License - https://fontawesome.com/license/free Copyright 2025 Fonticons, Inc.--><path d="M341.5 45.1C337.4 37.1 329.1 32 320.1 32C311.1 32 302.8 37.1 298.7 45.1L225.1 189.3L65.2 214.7C56.3 216.1 48.9 222.4 46.1 231C43.3 239.6 45.6 249 51.9 255.4L166.3 369.9L141.1 529.8C139.7 538.7 143.4 547.7 150.7 553C158 558.3 167.6 559.1 175.7 555L320.1 481.6L464.4 555C472.4 559.1 482.1 558.3 489.4 553C496.7 547.7 500.4 538.8 499 529.8L473.7 369.9L588.1 255.4C594.5 249 596.7 239.6 593.9 231C591.1 222.4 583.8 216.1 574.8 214.7L415 189.3L341.5 45.1z"/></svg>', 5-round($reviews_info['overall_rating']))?>
</span>
<span class="total"><?=$reviews_info['total_reviews']?> reviews</span>
</div>
<a href="#" class="write-review-btn">Write Review</a>
<div class="write-review">
<form>
<input name="name" type="text" placeholder="Your Name" required>
<input name="rating" type="number" min="1" max="5" placeholder="Rating (1-5)" required>
<textarea name="content" placeholder="Write your review here..." required></textarea>
<button type="submit">Submit Review</button>
</form>
</div>
<div class="reviews-wrapper">
<?php foreach ($reviews as $review): ?>
<div class="review">
<h3 class="name"><?=htmlspecialchars($review['display_name'], ENT_QUOTES)?></h3>
<div class="rating-wrapper">
<span class="rating">
<?=str_repeat('<svg width="20" height="20" xmlns="http://www.w3.org/2000/svg" viewBox="0 0 640 640"><!--!Font Awesome Free v7.0.0 by @fontawesome - https://fontawesome.com License - https://fontawesome.com/license/free Copyright 2025 Fonticons, Inc.--><path d="M341.5 45.1C337.4 37.1 329.1 32 320.1 32C311.1 32 302.8 37.1 298.7 45.1L225.1 189.3L65.2 214.7C56.3 216.1 48.9 222.4 46.1 231C43.3 239.6 45.6 249 51.9 255.4L166.3 369.9L141.1 529.8C139.7 538.7 143.4 547.7 150.7 553C158 558.3 167.6 559.1 175.7 555L320.1 481.6L464.4 555C472.4 559.1 482.1 558.3 489.4 553C496.7 547.7 500.4 538.8 499 529.8L473.7 369.9L588.1 255.4C594.5 249 596.7 239.6 593.9 231C591.1 222.4 583.8 216.1 574.8 214.7L415 189.3L341.5 45.1z"/></svg>', $review['rating'])?>
<?=str_repeat('<svg class="alt" width="20" height="20" xmlns="http://www.w3.org/2000/svg" viewBox="0 0 640 640"><!--!Font Awesome Free v7.0.0 by @fontawesome - https://fontawesome.com License - https://fontawesome.com/license/free Copyright 2025 Fonticons, Inc.--><path d="M341.5 45.1C337.4 37.1 329.1 32 320.1 32C311.1 32 302.8 37.1 298.7 45.1L225.1 189.3L65.2 214.7C56.3 216.1 48.9 222.4 46.1 231C43.3 239.6 45.6 249 51.9 255.4L166.3 369.9L141.1 529.8C139.7 538.7 143.4 547.7 150.7 553C158 558.3 167.6 559.1 175.7 555L320.1 481.6L464.4 555C472.4 559.1 482.1 558.3 489.4 553C496.7 547.7 500.4 538.8 499 529.8L473.7 369.9L588.1 255.4C594.5 249 596.7 239.6 593.9 231C591.1 222.4 583.8 216.1 574.8 214.7L415 189.3L341.5 45.1z"/></svg>', 5-$review['rating'])?>
</span>
<time datetime="<?=date('c', strtotime($review['submit_date']))?>" class="date" title="<?=date('d-m-Y H:ia', strtotime($review['submit_date']))?>"><?=time_elapsed_string($review['submit_date'])?></time>
</div>
<p class="content"><?=nl2br(htmlspecialchars($review['content'], ENT_QUOTES))?></p>
</div>
<?php endforeach ?>
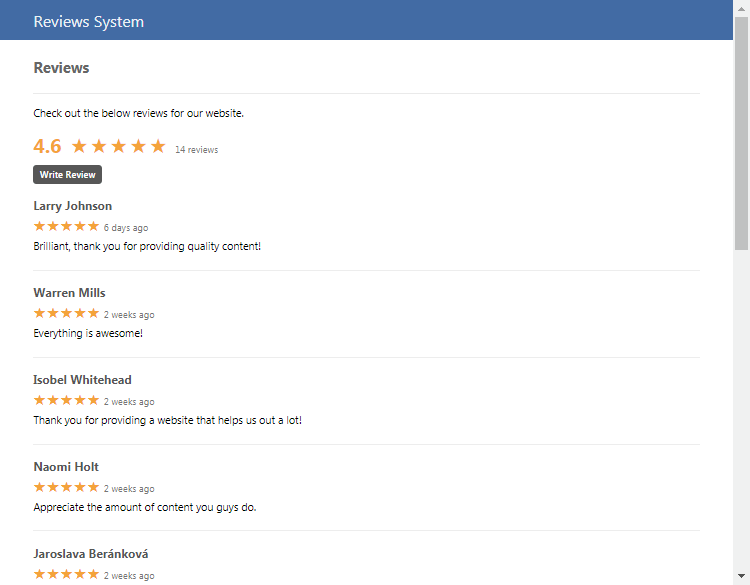
</div>The above code is the template for our review system, which will iterate the reviews array and populate them accordingly. The form to write the review and the overall rating also appear in the code.
The average rating and the total number of reviews will be displayed at the top, ranging from 1 to 5 stars.
Did You Know? The htmlspecialchars() function will convert special characters to HTML entities and therefore prevent XSS injection.
That's everything you must do on the back end. Next, we'll be using AJAX to retrieve the results and populate them on our webpage.
5. Implementing the Review System into our Webpage with AJAX
With the back-end complete, we can now create the front-end code. We will use AJAX to display the reviews on our webpage.
We can implement the reviews to any webpage as long as the page ID is specified. The template used below is just an example of how you can implement the review system.
Create the index.html file and add:
<!DOCTYPE html>
<html>
	<head>
		<meta charset="utf-8">
		<meta name="viewport" content="width=device-width,minimum-scale=1">
		<title>Review System</title>
		<link href="style.css" rel="stylesheet" type="text/css">
		<link href="reviews.css" rel="stylesheet" type="text/css">
	</head>
	<body>
	    <nav class="navtop">
	    	<div>
	    		<h1>Review System</h1>
	    	</div>
	    </nav>
		<div class="content">

			<h2>Reviews</h2>

			<p>Check out the below reviews for our website.</p>

		</div>
	</body>
</html>
The above code is the template we'll be using to test out the review system
After this line:
<p>Check out the below reviews for our website.</p>Add:
<div class="reviews"></div>

<script>
const reviews_page_id = 1;
fetch("reviews.php?page_id=" + reviews_page_id).then(response => response.text()).then(data => {
  document.querySelector(".reviews").innerHTML = data;
  document.querySelector(".reviews .write-review-btn").onclick = event => {
    event.preventDefault();
    document.querySelector(".reviews .write-review").style.display = 'block';
    document.querySelector(".reviews .write-review input[name='name']").focus();
  };
  document.querySelector(".reviews .write-review form").onsubmit = event => {
    event.preventDefault();
    fetch("reviews.php?page_id=" + reviews_page_id, {
      method: 'POST',
      body: new FormData(document.querySelector(".reviews .write-review form")),
      cache: 'no-cache'
    }).then(response => response.text()).then(data => {
      document.querySelector(".reviews .write-review").innerHTML = data;
    });
  };
});
</script>
Now, if you open localhost/phpreviews/index.html in your browser, you will see the review system in action:
If we want to change the page ID, we can update the reviews_page_id variable. You can implement the above code on any webpage. The only code you need to update is the reviews_page_id variable; every page should have a unique page ID.
You can put the AJAX code in a separate JavaScript file if you prefer, just don't forget to specify the reviews_page_id variable.
That is how you create a complete review system. You have learned how to use PHP, MySQL, and AJAX together to build a dynamic feature.
Security Best Practices
This code includes important security features. It is essential to understand them to protect your website and users.
We use PHP prepared statements to prevent SQL injection. This stops malicious users from running harmful database commands.
The htmlspecialchars() function is used to prevent Cross-Site Scripting (XSS). It converts special characters into HTML entities so they cannot be executed as code.
Next Steps and Improvements
After building the basic system, you can add more features. Here are a few ideas to make your review system even better.
- Add Pagination: If you have many reviews, loading them all at once can be slow. Add pagination to split them into multiple pages.
- Implement Admin Approval: Create a system where administrators must approve reviews before they appear publicly. This helps prevent spam and inappropriate content.
- Add Schema Markup: Use JSON-LD schema to tell search engines your content includes reviews. This can result in rich snippets (like star ratings) in search results, boosting your visibility.
- The Advanced package includes all these features and more!
Conclusion
You have successfully built a review system with PHP, MySQL, and AJAX. If any part of the code is unclear, feel free to review the article again. The official PHP manual is also a great resource for more information.
If you've enjoyed reading this article, consider sharing it on social media and/or drop a comment below.
Enjoy coding, and thanks for reading!
Frequently Asked Questions (FAQ)
How do I add the review system to another page?
To add the system to a new page, copy the HTML and JavaScript snippet from index.html. Change the reviews_page_id variable to a new, unique number for that page.
How can I protect against spam reviews?
You can add a CAPTCHA like Google's reCAPTCHA to the review form. You could also implement a system where users must be logged in to write a review.
Is this review system secure?
The system uses prepared statements to prevent SQL injection and htmlspecialchars() to prevent XSS attacks. These are essential security practices for any web application.
If you would like to support us, consider the advanced review system below. It will greatly help us create more tutorials and keep our website up and running. The advanced package includes improved code and more features.