 Download the full source codeComplete working project · Setup guide included · Free for commercial use
Free ZIP
Download the full source codeComplete working project · Setup guide included · Free for commercial use
Free ZIP
In this tutorial, we'll be developing a shopping cart system with PHP and MySQL. The shopping cart system will enable visitors to browse for products, add to cart products, and place orders.
We'll be using the PDO interface to access our MySQL database with PHP as it will make it much easier for us to interact with our database and manipulate our tables.
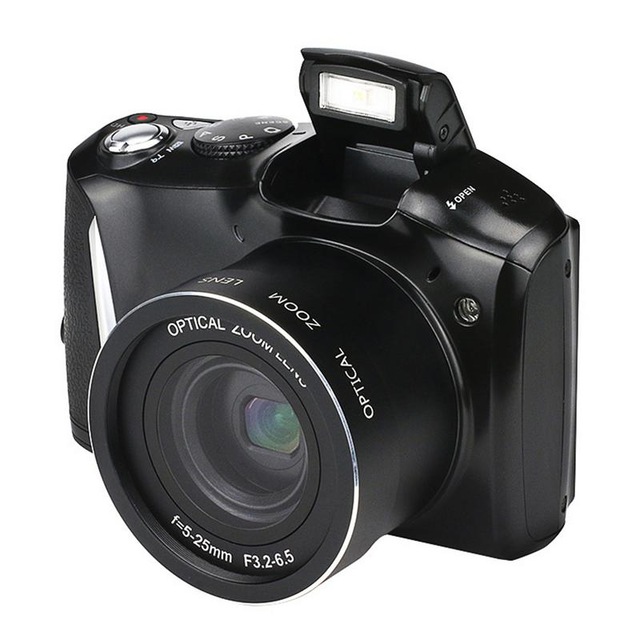
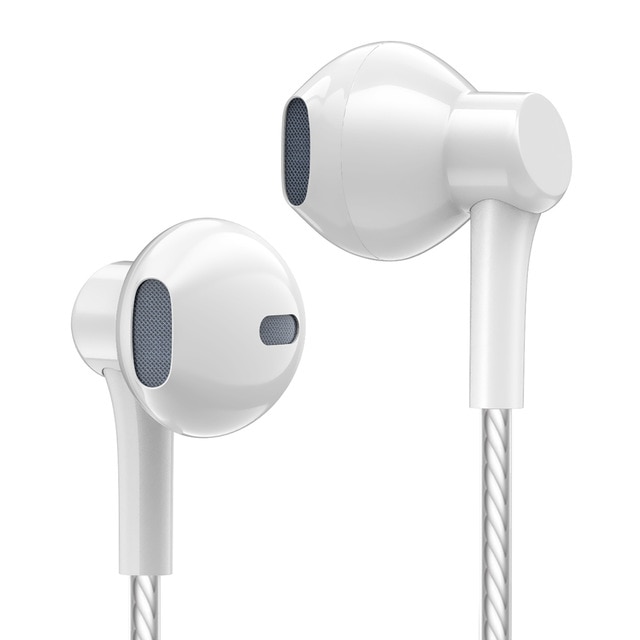
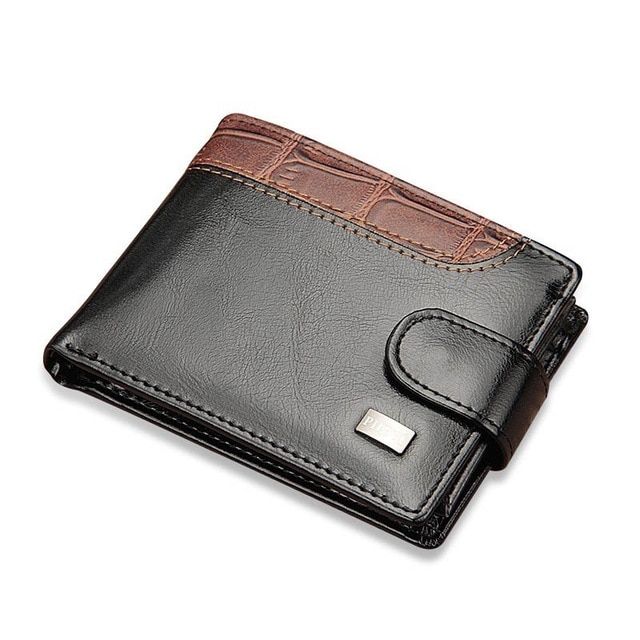
The shopping cart system we'll be creating will contain four products. These products are basically just gadgets/accessories that we'll use as examples for this tutorial. You can add your own products later in the tutorial.
The Advanced package includes additional features and a download link to the source code.
Contents
1. Getting Started
There are a few steps we need to take before we create our shopping cart system. We need to set-up our web-server environment (if you haven't already) and make sure we have the required extensions enabled.
1.1. Demos
Below, you will find links to the shopping cart demos. The tutorial demo is what we'll be creating. The Advanced demo is the package you can purchase at the end of the post. This includes more features and a download link to the source code.
1.2. Requirements
- If you haven't got a local web server setup, you should download and install XAMPP.
- Make sure the PDO extension is enabled (it should be included and enabled by default).
1.3. What You Will Learn in this Tutorial
- Template Design — Design a home page, products page, product page, shopping cart page, and place order page with HTML5 and CSS3, and learn how to implement the PHP templating system with HTML.
- GET and POST Requests — Create HTML forms and data request handling with PHP.
- Prepared SQL Queries — How to prepare SQL queries to prevent SQL injection.
- Basic Validation — Validating form data that is sent to the server.
- Session Management — Initialize sessions and store shopping cart products.
1.4. File Structure & Setup
We can now start our web server and create the files and directories we're going to use for our shopping cart system.
- Open XAMPP Control Panel
- Next to the Apache module, click Start
- Next to the MySQL module, click Start
- Navigate to XAMPPs installation directory (C:\xampp)
- Open the htdocs directory
- Create the following directories and files:
File Structure
\-- shoppingcart
|-- functions.php
|-- index.php
|-- home.php
|-- products.php
|-- product.php
|-- cart.php
|-- placeorder.php
|-- style.css
\-- imgs
|-- featured-image.jpg
|-- camera.jpg
|-- headphones.jpg
|-- wallet.jpg
|-- watch.jpg
Each file/directory will contain the following:
- functions.php — This file will contain all the functions we need for our shopping cart system (template header, template footer, and database connection functions).
- index.php — This file will contain the master template (header, footer, etc.) and basic routing so we can include the pages below.
- home.php — This file will be the home page that will contain a featured image and four recently added products.
- products.php — This file will be for displaying all products with basic pagination.
- product.php — This file will display a product (depending on the GET request) and will contain a form that will allow the customer to change the quantity and add the product to the cart.
- cart.php — The shopping cart page will populate all the products that have been added to the cart, along with the quantities, total prices, and subtotal prices.
- placeorder.php — A basic message that will be displayed to the user when they place an order.
- style.css — The stylesheet (CSS3) we'll use for our shopping cart website.
- imgs — Directory that will contain all the images for our shopping cart system (featured images, product images, etc). You can download the example images by clicking the file name in the file structure container.
2. Creating the Database and setting-up Tables
For this part, you will need to access your MySQL database, either using phpMyAdmin or your preferred MySQL database management application.
If you're using phpMyAdmin, follow these instructions:
- Navigate to localhost/phpmyadmin in your web browser
- Select the Databases tab at the top
- Under Create database, type in shoppingcart in the text box
- Select utf8mb4_unicode_ci as the collation (UTF-8 is the default encoding in HTML5+)
- Select Create
Feel free to use your own database name, or use shoppingcart as the database name.
We can now proceed to create the products table. We'll use this table to store all our products, along with the product name, description, image, price, RRP price, quantity, and the date added columns. We shall retrieve these products later on in the tutorial with PHP.
While in phpMyAdmin, select our newly created database in the left side panel (shoppingcart) and execute the following SQL statement:
CREATE TABLE IF NOT EXISTS `products` (
  `id` int(11) NOT NULL AUTO_INCREMENT,
  `title` varchar(200) NOT NULL,
  `description` mediumtext NOT NULL,
  `price` decimal(7,2) NOT NULL,
  `rrp` decimal(7,2) NOT NULL DEFAULT 0.00,
  `quantity` int(11) NOT NULL,
  `img` mediumtext NOT NULL,
  `date_added` datetime NOT NULL DEFAULT current_timestamp(),
  PRIMARY KEY (`id`)
) ENGINE=InnoDB AUTO_INCREMENT=5 DEFAULT CHARSET=utf8mb4 COLLATE=utf8mb4_unicode_ci;

INSERT INTO `products` (`id`, `title`, `description`, `price`, `rrp`, `quantity`, `img`, `date_added`) VALUES
(1, 'Smart Watch', '<p>Unique watch made with stainless steel, ideal for those that prefer interative watches.</p>\r\n<h3>Features</h3>\r\n<ul>\r\n<li>Powered by Android with built-in apps.</li>\r\n<li>Adjustable to fit most.</li>\r\n<li>Long battery life, continuous wear for up to 2 days.</li>\r\n<li>Lightweight design, comfort on your wrist.</li>\r\n</ul>', '29.99', '0.00', 10, 'watch.jpg', '2025-01-01 00:00:00'),
(2, 'Wallet', '', '14.99', '19.99', 34, 'wallet.jpg', '2025-01-01 00:00:00'),
(3, 'Headphones', '', '19.99', '0.00', 23, 'headphones.jpg', '2025-01-01 00:00:00'),
(4, 'Digital Camera', '', '69.99', '0.00', 7, 'camera.jpg', '2025-01-01 00:00:00');
In phpMyAdmin, it will resemble the following:
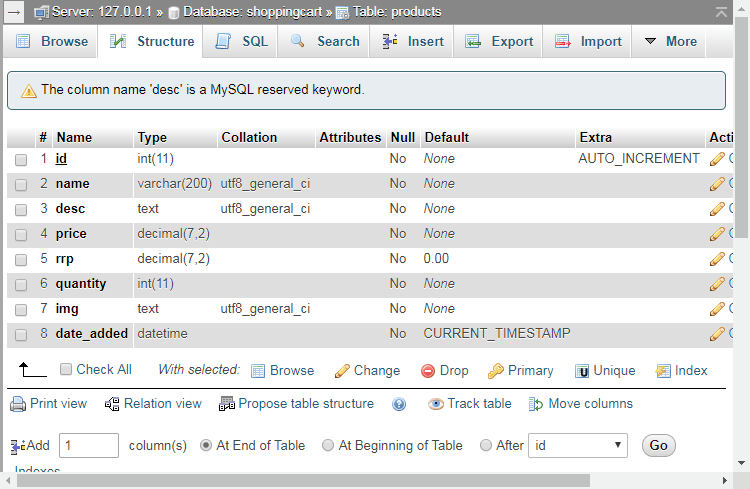
The above SQL statement code will create the products table with the following columns:
- id — Unique ID for the product, which will be auto-incremented.
- title — The name of the product.
- description — The description of the product.
- price — The price of the product.
- rrp — The retail pricing, if you want a product on sale, you put the value higher than the price.
- date_added — The date the product was added, which we'll use for sorting products, etc.
The SQL statement will also insert 4 example products that we can use for testing purposes. You can change/remove them later on in the tutorial when we've implemented the code.
3. Designing the Shopping Cart System with CSS
Instead of using a library such as Bootstrap, I've decided to create a clean, crisp, and modern design with pure CSS3.
The Advanced package includes the SCSS file and the responsive design CSS code. You can easily change the color scheme, fonts, content size, etc, with SCSS.
Edit the style.css file and add the following code:
* {
	box-sizing: border-box;
	font-family: system-ui, "Segoe UI", Roboto, Helvetica, Arial, sans-serif, "Apple Color Emoji", "Segoe UI Emoji", "Segoe UI Symbol";
	font-size: 16px;
}
html {
	height: 100%;
}
body {
	position: relative;
	min-height: 100%;
	color: #555555;
	background-color: #FFFFFF;
	margin: 0;
	padding-bottom: 100px; /* Same height as footer */
}
h1, h2, h3, h4, h5 {
	color: #394352;
}
.content-wrapper {
	width: 1050px;
	margin: 0 auto;
}
header {
	border-bottom: 1px solid #EEEEEE;
}
header .content-wrapper {
	display: flex;
}
header h1 {
	display: flex;
	flex-grow: 1;
	flex-basis: 0;
	font-size: 20px;
	margin: 0;
	padding: 24px 0;
}
header nav {
	display: flex;
	flex-grow: 1;
	flex-basis: 0;
	justify-content: center;
	align-items: center;
}
header nav a {
	text-decoration: none;
	color: #555555;
	padding: 10px 10px;
	margin: 0 10px;
}
header nav a:hover {
	border-bottom: 1px solid #aaa;
}
header .link-icons {
	display: flex;
	flex-grow: 1;
	flex-basis: 0;
	justify-content: flex-end;
	align-items: center;
	position: relative;
}
header .link-icons a {
	text-decoration: none;
	color: #394352;
	padding: 0 10px;
}
header .link-icons a:hover {
	color: #4e5c70;
}
header .link-icons a i {
	font-size: 18px;
}
header .link-icons a span {
	display: inline-block;
	text-align: center;
	background-color: #63748e;
	border-radius: 50%;
	color: #FFFFFF;
	font-size: 12px;
	line-height: 16px;
	width: 16px;
	height: 16px;
	font-weight: bold;
	position: absolute;
	top: 22px;
	right: 0;
}
main .featured {
	display: flex;
	flex-direction: column;
	background-image: url(imgs/featured-image.jpg);
	background-repeat: no-repeat;
	background-size: cover;
	height: 500px;
	align-items: center;
	justify-content: center;
	text-align: center;
}
main .featured h2 {
	display: inline-block;
	margin: 0;
	width: 1050px;
	font-family: Rockwell, Courier Bold, Courier, Georgia, Times, Times New Roman, serif;
	font-size: 68px;
	color: #FFFFFF;
	padding-bottom: 10px;
}
main .featured p {
	display: inline-block;
	margin: 0;
	width: 1050px;
	font-size: 24px;
	color: #FFFFFF;
}
main .recentlyadded h2 {
	display: block;
	font-weight: normal;
	margin: 0;
	padding: 40px 0;
	font-size: 24px;
	text-align: center;
	width: 100%;
	border-bottom: 1px solid #EEEEEE;
}
main .recentlyadded .products, main .products .products-wrapper {
	display: flex;
	flex-wrap: wrap;
	align-items: center;
	justify-content: space-between;
	padding: 40px 0 0 0;
}
main .recentlyadded .products .product, main .products .products-wrapper .product {
	display: block;
	overflow: hidden;
	text-decoration: none;
	width: 25%;
	padding-bottom: 60px;
}
main .recentlyadded .products .product img, main .products .products-wrapper .product img {
	transform: scale(1);
	transition: transform 1s;
}
main .recentlyadded .products .product .name, main .products .products-wrapper .product .name {
	display: block;
	color: #555555;
	padding: 20px 0 2px 0;
}
main .recentlyadded .products .product .price, main .products .products-wrapper .product .price {
	display: block;
	color: #999999;
}
main .recentlyadded .products .product .rrp, main .products .products-wrapper .product .rrp {
	color: #BBBBBB;
	text-decoration: line-through;
}
main .recentlyadded .products .product:hover img, main .products .products-wrapper .product:hover img {
	transform: scale(1.05);
	transition: transform 1s;
}
main .recentlyadded .products .product:hover .name, main .products .products-wrapper .product:hover .name {
	text-decoration: underline;
}
main > .product {
	display: flex;
	padding: 40px 0;
}
main > .product > div {
	padding-left: 15px;
}
main > .product h1 {
	font-size: 34px;
	font-weight: normal;
	margin: 0;
	padding: 20px 0 10px 0;
}
main > .product .price {
	display: block;
	font-size: 22px;
	color: #999999;
}
main > .product .rrp {
	color: #BBBBBB;
	text-decoration: line-through;
	font-size: 22px;
	padding-left: 5px;
}
main > .product form {
	display: flex;
	flex-flow: column;
	margin: 40px 0;
}
main > .product form input[type="number"] {
	width: 400px;
	padding: 10px;
	margin-bottom: 15px;
	border: 1px solid #ccc;
	color: #555555;
	border-radius: 5px;
}
main > .product form input[type="submit"] {
	background: #4e5c70;
	border: 0;
	color: #FFFFFF;
	width: 400px;
	padding: 12px 0;
	text-transform: uppercase;
	font-size: 14px;
	font-weight: bold;
	border-radius: 5px;
	cursor: pointer;
}
main > .product form input[type="submit"]:hover {
	background: #434f61;
}
main > .products h1 {
	display: block;
	font-weight: normal;
	margin: 0;
	padding: 40px 0;
	font-size: 24px;
	text-align: center;
	width: 100%;
}
main > .products .buttons {
	text-align: right;
	padding-bottom: 40px;
}
main > .products .buttons a {
	display: inline-block;
	text-decoration: none;
	margin-left: 5px;
	padding: 12px 20px;
	border: 0;
	background: #4e5c70;
	color: #FFFFFF;
	font-size: 14px;
	font-weight: bold;
	border-radius: 5px;
}
main > .products .buttons a:hover {
	background: #434f61;
}
main .cart h1 {
	display: block;
	font-weight: normal;
	margin: 0;
	padding: 40px 0;
	font-size: 24px;
	text-align: center;
	width: 100%;
}
main .cart table {
	width: 100%;
}
main .cart table thead td {
	padding: 30px 0;
	border-bottom: 1px solid #EEEEEE;
}
main .cart table thead td:last-child {
	text-align: right;
}
main .cart table tbody td {
	padding: 20px 0;
	border-bottom: 1px solid #EEEEEE;
}
main .cart table tbody td:last-child {
	text-align: right;
}
main .cart table .img {
	width: 80px;
}
main .cart table .remove {
	color: #777777;
	font-size: 12px;
	padding-top: 3px;
}
main .cart table .remove:hover {
	text-decoration: underline;
}
main .cart table .price {
	color: #999999;
}
main .cart table a {
	text-decoration: none;
	color: #555555;
}
main .cart table input[type="number"] {
	width: 68px;
	padding: 10px;
	border: 1px solid #ccc;
	color: #555555;
	border-radius: 5px;
}
main .cart .subtotal {
	text-align: right;
	padding: 40px 0;
}
main .cart .subtotal .text {
	padding-right: 40px;
	font-size: 18px;
}
main .cart .subtotal .price {
	font-size: 18px;
	color: #999999;
}
main .cart .buttons {
	text-align: right;
	padding-bottom: 40px;
}
main .cart .buttons input[type="submit"] {
	margin-left: 5px;
	padding: 12px 20px;
	border: 0;
	background: #4e5c70;
	color: #FFFFFF;
	font-size: 14px;
	font-weight: bold;
	cursor: pointer;
	border-radius: 5px;
}
main .cart .buttons input[type="submit"]:hover {
	background: #434f61;
}
main .placeorder h1 {
	display: block;
	font-weight: normal;
	margin: 0;
	padding: 40px 0;
	font-size: 24px;
	text-align: center;
	width: 100%;
}
main .placeorder p {
	text-align: center;
}
footer {
	position: absolute;
	bottom: 0;
	border-top: 1px solid #EEEEEE;
	padding: 20px 0;
	width: 100%;
}
This will be the stylesheet we'll use for the shopping cart system.
4. Creating the Functions File
The functions.php file will contain all the functions we're going to use in our shopping cart system which includes the template header, template footer, and the database connection functions.
Edit the functions.php file and add the following:
<?php
function pdo_connect_mysql() {
// Update the details below with your MySQL details
$DATABASE_HOST = 'localhost';
$DATABASE_USER = 'root';
$DATABASE_PASS = '';
$DATABASE_NAME = 'shoppingcart';
try {
return new PDO('mysql:host=' . $DATABASE_HOST . ';dbname=' . $DATABASE_NAME . ';charset=utf8mb4', $DATABASE_USER, $DATABASE_PASS);
} catch (PDOException $exception) {
// If there is an error with the connection, stop the script and display the error.
exit('Failed to connect to database!');
}
}
// Template header, feel free to customize this
function template_header($title) {
echo <<<EOT
<!DOCTYPE html>
<html>
<head>
<meta charset="utf-8">
<title>$title</title>
<link href="style.css" rel="stylesheet" type="text/css">
<link rel="stylesheet" href="https://use.fontawesome.com/releases/v5.7.1/css/all.css">
</head>
<body>
<header>
<div class="content-wrapper">
<h1>Shopping Cart System</h1>
<nav>
<a href="index.php">Home</a>
<a href="index.php?page=products">Products</a>
</nav>
<div class="link-icons">
<a href="index.php?page=cart">
<i class="fas fa-shopping-cart"></i>
</a>
</div>
</div>
</header>
<main>
EOT;
}
// Template footer
function template_footer() {
$year = date('Y');
echo <<<EOT
</main>
<footer>
<div class="content-wrapper">
<p>© $year, Shopping Cart System</p>
</div>
</footer>
</body>
</html>
EOT;
}
?>These functions will make it much easier for us to connect to the database and format our pages. We'll be including this file in a majority of our PHP files. Instead of writing the same template code repeatedly, we can easily execute the function name. We can also change the layout of our shopping cart system without editing every single file.
We're using Font Awesome (free icon library) for our font icons. The stylesheet CDN is included in the HTML head section (template header function).
5. Creating the Index File
The index.php file will basically be our main file for accessing all our pages. We'll set up basic routing and use GET requests to determine which page is which.
5.1. Connect to MySQL Database
Edit the index.php file and add the following:
<?php
session_start();
// Include functions and connect to the database using PDO MySQL
include 'functions.php';
$pdo = pdo_connect_mysql();
We first create the session with the session_start function. With that, we can store the products that are added to the cart. Subsequently, the script will connect to MySQL using the database connection function we created earlier in the functions.php file.
Note: Update the database connection variables if you cannot connect to your MySQL database.
5.2. Basic Routing
Add after:
// Page is set to home (home.php) by default, so when the visitor visits, that will be the page they see.
$page = isset($_GET['page']) && file_exists($_GET['page'] . '.php') ? $_GET['page'] : 'home';
// Include and show the requested page
include $page . '.php';
?>
The basic routing method used above checks if the GET request variable ($_GET['page']) exists. If not, the default page will be set to the home page, whereas if it exists, it will be the requested page.
For example, if we want to access the products page, we can navigate to localhost/shoppingcart/index.php?page=products in our web browser.
If you navigate to the index.php page in your browser, the page will appear blank - that's because we haven't edited the home.php file yet.
6. Creating the Home Page
The home page will be the first page our customers will see. For this page, we can add a featured image and text, along with a list of 4 recently added products.
6.1. Get 4 Products from Database
Edit the home.php file and add the following:
<?php
// Get the 4 most recently added products
$stmt = $pdo->prepare('SELECT * FROM products ORDER BY date_added DESC LIMIT 4');
$stmt->execute();
$recently_added_products = $stmt->fetchAll(PDO::FETCH_ASSOC);
?>
The above code will execute a SQL query to retrieve the four most recently added products from our database. All we have to do with this query is ORDER BY the date_added column and limit the number of results by 4. Pretty straightforward, right? And then subsequently store the result in the $recently_added_products variable as an associated array.
6.2. Create Home Template
Add after the PHP closing tag:
<?=template_header('Home')?>
<div class="featured">
<h2>Gadgets</h2>
<p>Essential gadgets for everyday use</p>
</div>
<div class="recentlyadded content-wrapper">
<h2>Recently Added Products</h2>
<div class="products">
<?php foreach ($recently_added_products as $product): ?>
<a href="index.php?page=product&id=<?=$product['id']?>" class="product">
<img src="imgs/<?=$product['img']?>" width="200" height="200" alt="<?=$product['title']?>">
<span class="name"><?=$product['title']?></span>
<span class="price">
$<?=$product['price']?>
<?php if ($product['rrp'] > 0): ?>
<span class="rrp">$<?=$product['rrp']?></span>
<?php endif; ?>
</span>
</a>
<?php endforeach; ?>
</div>
</div>
<?=template_footer()?>This will create a basic home page template. The above code will iterate the $recently_added_products array variable and populate them accordingly. The RRP price will be included but only if the value is greater than 0.
If you prefer to use your own currency, you can change the default dollar symbol ($). You can find a complete list of options in our HTML currency symbols reference.
Note: all the product images are located in the img directory. You'll need to download the images for those products if you're using the example products we created previously. You can download them in the File Structure section.
If we navigate to localhost/shoppingcart/index.php, it should look like the following:
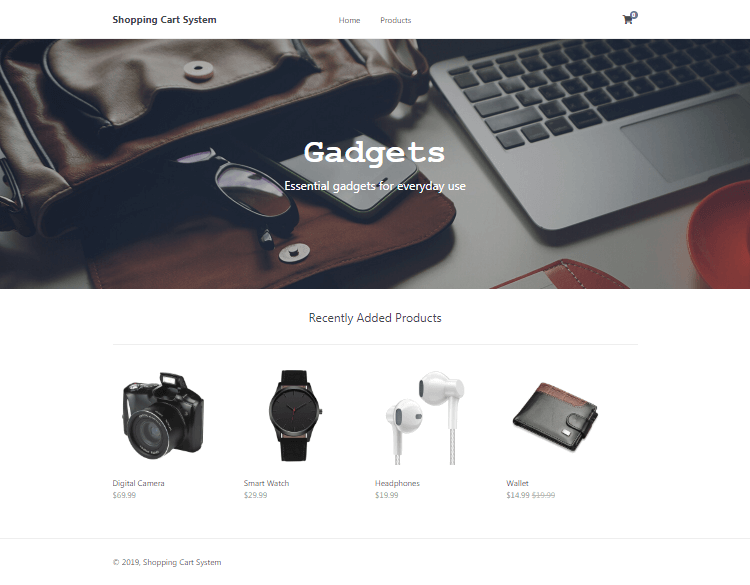
You can also access the home page by specifying the page parameter (localhost/shoppingcart/index.php?page=home). This is possible because of the basic routing we implemented earlier.
7. Creating the Products Page
The products page will be where our customers will go to browse all of our products. We will limit the number of products to show on each page and add pagination that will allow the customers to navigate between pages.
7.1. Get Products from Database with Pagination
Edit the products.php file and add the following:
<?php
// The amounts of products to show on each page
$num_products_on_each_page = 4;
// The current page - in the URL, will appear as index.php?page=products&p=1, index.php?page=products&p=2, etc...
$current_page = isset($_GET['p']) && is_numeric($_GET['p']) ? (int)$_GET['p'] : 1;
// Select products ordered by the date added
$stmt = $pdo->prepare('SELECT * FROM products ORDER BY date_added DESC LIMIT ?,?');
// bindValue will allow us to use an integer in the SQL statement, which we need to use for the LIMIT clause
$stmt->bindValue(1, ($current_page - 1) * $num_products_on_each_page, PDO::PARAM_INT);
$stmt->bindValue(2, $num_products_on_each_page, PDO::PARAM_INT);
$stmt->execute();
// Fetch the products from the database and return the result as an Array
$products = $stmt->fetchAll(PDO::FETCH_ASSOC);
Updating the $num_products_on_each_page variable will limit the number of products to show on each page.
To determine which page the customer is on, we can execute a GET request. In the URL, this will appear as index.php?page=products&p=1, etc., and in our PHP script, the parameter p (which represents the page identifier) we can retrieve with the $_GET['p'] variable. Assuming the request is valid, the code will execute a query that will retrieve the limited products from our database.
Note: We're executing queries using prepared statements.Prepared statements will fully prevent SQL injection. It's good practice to prepare statements with GET and POST requests.
7.2. Get the Total number of Products
Add after:
// Get the total number of products
$total_products = $pdo->query('SELECT * FROM products')->rowCount();
?>
The code above will get the total number of products in our products table. The customer will be able to see the total number of products at the top of the products page.
7.3. Create Products Template
Add after the PHP closing tag:
<?=template_header('Products')?>
<div class="products content-wrapper">
<h1>Products</h1>
<p><?=$total_products?> Products</p>
<div class="products-wrapper">
<?php foreach ($products as $product): ?>
<a href="index.php?page=product&id=<?=$product['id']?>" class="product">
<img src="imgs/<?=$product['img']?>" width="200" height="200" alt="<?=$product['title']?>">
<span class="name"><?=$product['title']?></span>
<span class="price">
$<?=$product['price']?>
<?php if ($product['rrp'] > 0): ?>
<span class="rrp">$<?=$product['rrp']?></span>
<?php endif; ?>
</span>
</a>
<?php endforeach; ?>
</div>
<div class="buttons">
<?php if ($current_page > 1): ?>
<a href="index.php?page=products&p=<?=$current_page-1?>">Prev</a>
<?php endif; ?>
<?php if ($total_products > ($current_page * $num_products_on_each_page) - $num_products_on_each_page + count($products)): ?>
<a href="index.php?page=products&p=<?=$current_page+1?>">Next</a>
<?php endif; ?>
</div>
</div>
<?=template_footer()?>Remember the recently added products we created for the home page? We basically use the same code, but instead, it's determined by the products page and the $num_products_on_each_page variable.
The Next and Prev buttons will only be visible to the user if the total number of products is greater than the $num_products_on_each_page variable.
If we navigate to localhost/shoppingcart/index.php?page=products it should look like the following:
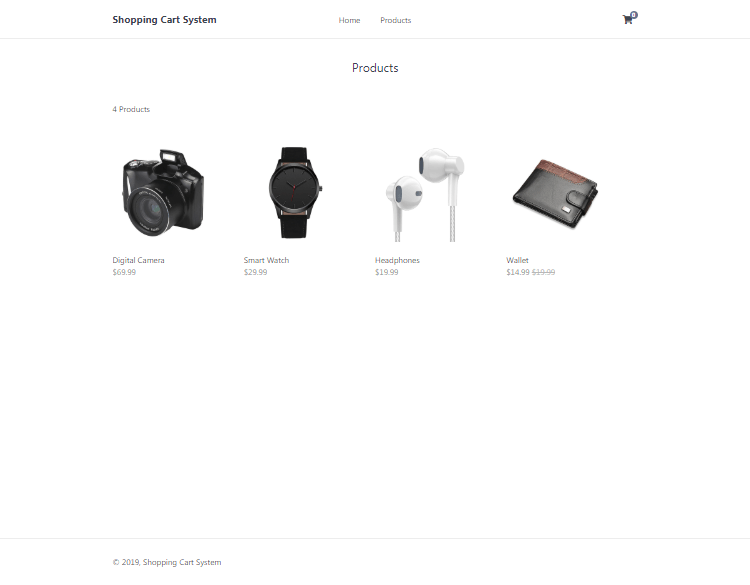
That's basically all we need to do for the products page. Additional features, such as product sorting, are available in the Advanced packages.
8. Creating the Product Page
The product page will display all details for a specified product, determined by the GET request ID variable. Customers can view the price, image, and description. The customer will be able to change the quantity and add to the cart with a click of a button.
8.1. Get Product from Database with GET Request
Edit the product.php file and add the following:
<?php
// Check to make sure the id parameter is specified in the URL
if (isset($_GET['id'])) {
    // Prepare statement and execute, prevents SQL injection
    $stmt = $pdo->prepare('SELECT * FROM products WHERE id = ?');
    $stmt->execute([$_GET['id']]);
    // Fetch the product from the database and return the result as an Array
    $product = $stmt->fetch(PDO::FETCH_ASSOC);
    // Check if the product exists (array is not empty)
    if (!$product) {
        // Simple error to display if the id for the product doesn't exists (array is empty)
        exit('Product does not exist!');
    }
} else {
    // Simple error to display if the id wasn't specified
    exit('Product does not exist!');
}
?>
The code above will check if the requested id variable (GET request) exists. If specified, the code will proceed to retrieve the product from the products table in our database.
If the product doesn't exist in the database, the code will output a simple error, the exit() function will prevent further script execution and display the error.
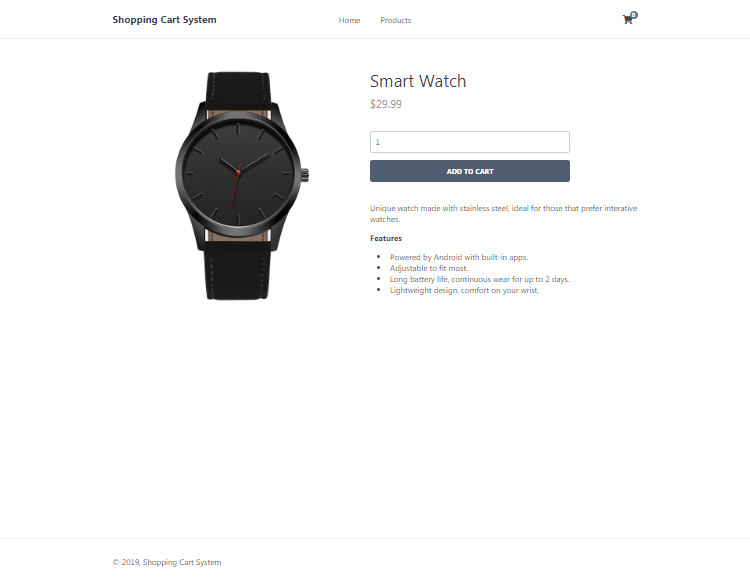
8.2. Create Product Template
Add after the PHP closing tag:
<?=template_header('Product')?>
<div class="product content-wrapper">
<img src="imgs/<?=$product['img']?>" width="500" height="500" alt="<?=$product['title']?>">
<div>
<h1 class="name"><?=$product['title']?></h1>
<span class="price">
$<?=$product['price']?>
<?php if ($product['rrp'] > 0): ?>
<span class="rrp">$<?=$product['rrp']?></span>
<?php endif; ?>
</span>
<form action="index.php?page=cart" method="post">
<input type="number" name="quantity" value="1" min="1" max="<?=$product['quantity']?>" placeholder="Quantity" required>
<input type="hidden" name="product_id" value="<?=$product['id']?>">
<input type="submit" value="Add To Cart">
</form>
<div class="description">
<?=$product['description']?>
</div>
</div>
</div>
<?=template_footer()?>The template we'll use for the product page. The form is created, and the action attribute is set to the shopping cart page (index.php?page=cart) along with the method set to post. The shopping cart page (cart.php) will add the product to the cart.
With the quantity form field, we can set a maximum value, which will reflect the product's quantity (retrieved from the products table). The product ID is also added to the form, as this is so we know which product the customer added.
We don't need to include the product's name, description, etc, as we can get that data from the products table in our database with the product ID.
If we navigate to localhost/shoppingcart/index.php?page=product&id=1 it should look like the following:
If you change the id parameter in the URL to, let's say, 2, it will show us a different product.
9. Creating the Shopping Cart Page
The shopping cart page is where the customer will be able to see a list of their products added to the shopping cart. They will have the ability to remove products and update the quantities.
9.1. Adding a Product to Cart
Edit the cart.php file and add the following:
<?php
// If the user clicked the add to cart button on the product page we can check for the form data
if (isset($_POST['product_id'], $_POST['quantity']) && is_numeric($_POST['product_id']) && is_numeric($_POST['quantity'])) {
    // Set the post variables so we easily identify them, also make sure they are integer
    $product_id = (int)$_POST['product_id'];
    $quantity = (int)$_POST['quantity'];
    // Prepare the SQL statement, we basically are checking if the product exists in our databaser
    $stmt = $pdo->prepare('SELECT * FROM products WHERE id = ?');
    $stmt->execute([$_POST['product_id']]);
    // Fetch the product from the database and return the result as an Array
    $product = $stmt->fetch(PDO::FETCH_ASSOC);
    // Check if the product exists (array is not empty)
    if ($product && $quantity > 0) {
        // Product exists in database, now we can create/update the session variable for the cart
        if (isset($_SESSION['cart']) && is_array($_SESSION['cart'])) {
            if (array_key_exists($product_id, $_SESSION['cart'])) {
                // Product exists in cart so just update the quanity
                $_SESSION['cart'][$product_id] += $quantity;
            } else {
                // Product is not in cart so add it
                $_SESSION['cart'][$product_id] = $quantity;
            }
        } else {
            // There are no products in cart, this will add the first product to cart
            $_SESSION['cart'] = array($product_id => $quantity);
        }
    }
    // Prevent form resubmission...
    header('location: index.php?page=cart');
    exit;
}
In the code above we make use of the PHP session variables. We can use PHP sessions to remember the shopping cart products. For example, when a customer navigates to another page, the shopping cart will still contain the products previously added until the session expires (usually around 30 minutes).
The code above will check if a product was added to the cart. Returning to the product.php file, you can see that we created an HTML form. We are checking for those form values. If the product exists, proceed to verify the product by selecting it from our products table in our database. We wouldn't want customers manipulating the system and adding non-existent products.
The session variable cart will be an associated array of products, and with this array, we can add multiple products to the shopping cart. The array key will be the product ID, and the value will be the quantity. If a product already exists in the shopping cart, all we have to do is update the quantity.
9.2. Removing a Product from Cart
Add after:
// Remove product from cart, check for the URL param "remove", this is the product id, make sure it's a number and check if it's in the cart
if (isset($_GET['remove']) && is_numeric($_GET['remove']) && isset($_SESSION['cart']) && isset($_SESSION['cart'][$_GET['remove']])) {
    // Remove the product from the shopping cart
    unset($_SESSION['cart'][$_GET['remove']]);
}
On the shopping cart page, the customer will have the ability to remove a product from the cart. When the button is clicked, we can use a GET request to determine which product to remove. For example, if we have a product with the ID 1, the following URL will remove it from the shopping cart: localhost/shoppingcart/index.php?page=cart&remove=1.
9.3. Updating Product Quantities
Add after:
// Update product quantities in cart if the user clicks the "Update" button on the shopping cart page
if (isset($_POST['update']) && isset($_SESSION['cart'])) {
    // Loop through the post data so we can update the quantities for every product in cart
    foreach ($_POST as $k => $v) {
        if (strpos($k, 'quantity') !== false && is_numeric($v)) {
            $id = str_replace('quantity-', '', $k);
            $quantity = (int)$v;
            // Always do checks and validation
            if (is_numeric($id) && isset($_SESSION['cart'][$id]) && $quantity > 0) {
                // Update new quantity
                $_SESSION['cart'][$id] = $quantity;
            }
        }
    }
    // Prevent form resubmission...
    header('Location: index.php?page=cart');
    exit;
}
The code above will iterate the products in the shopping cart and update the quantities. The customer will have the ability to change the quantities on the shopping cart page. The Update button has the name of update, as this is how the code will know when to update the quantities using a POST request.
9.4. Handling the Place Order
Add after:
// Send the user to the place order page if they click the Place Order button, also the cart should not be empty
if (isset($_POST['placeorder']) && isset($_SESSION['cart']) && !empty($_SESSION['cart'])) {
    header('Location: index.php?page=placeorder');
    exit;
}
This will redirect the user to the place order page if they click the Place Order button.
9.5. Get Products in Cart and Select from Database
Add after:
// Check the session variable for products in cart
$products_in_cart = isset($_SESSION['cart']) ? $_SESSION['cart'] : array();
$products = array();
$subtotal = 0.00;
// If there are products in cart
if ($products_in_cart) {
    // There are products in the cart so we need to select those products from the database
    // Products in cart array to question mark string array, we need the SQL statement to include IN (?,?,?,...etc)
    $array_to_question_marks = implode(',', array_fill(0, count($products_in_cart), '?'));
    $stmt = $pdo->prepare('SELECT * FROM products WHERE id IN (' . $array_to_question_marks . ')');
    // We only need the array keys, not the values, the keys are the id's of the products
    $stmt->execute(array_keys($products_in_cart));
    // Fetch the products from the database and return the result as an Array
    $products = $stmt->fetchAll(PDO::FETCH_ASSOC);
    // Calculate the subtotal
    foreach ($products as $product) {
        $subtotal += (float)$product['price'] * (int)$products_in_cart[$product['id']];
    }
}
?>
If there are products in the shopping cart, retrieve those products from our products table, along with the following column name: product name, description, image, and price, as before we didn't store this information in our session variable.
We also calculate the subtotal by iterating the products and multiplying the price by the quantity.
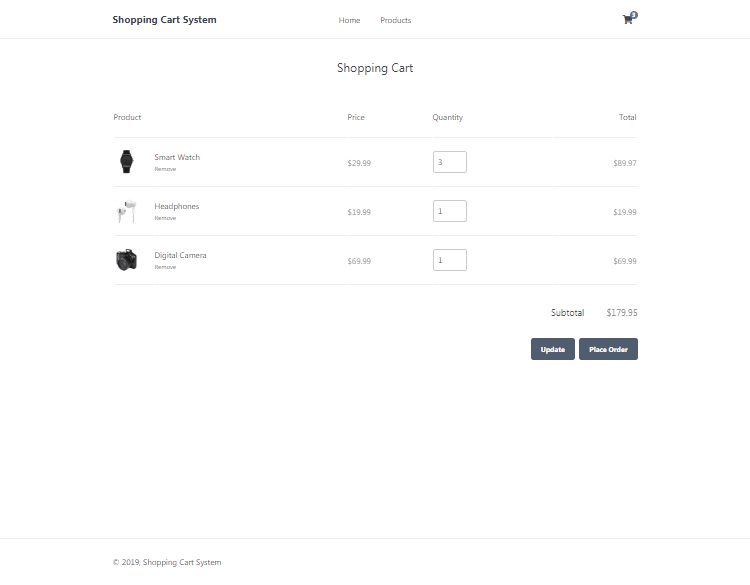
9.6. Create Shopping Cart Template
Add below the PHP closing tag:
<?=template_header('Cart')?>
<div class="cart content-wrapper">
<h1>Shopping Cart</h1>
<form action="index.php?page=cart" method="post">
<table>
<thead>
<tr>
<td colspan="2">Product</td>
<td>Price</td>
<td>Quantity</td>
<td>Total</td>
</tr>
</thead>
<tbody>
<?php if (empty($products)): ?>
<tr>
<td colspan="5" style="text-align:center;">You have no products added in your Shopping Cart</td>
</tr>
<?php else: ?>
<?php foreach ($products as $product): ?>
<tr>
<td class="img">
<a href="index.php?page=product&id=<?=$product['id']?>">
<img src="imgs/<?=$product['img']?>" width="50" height="50" alt="<?=$product['title']?>">
</a>
</td>
<td>
<a href="index.php?page=product&id=<?=$product['id']?>"><?=$product['title']?></a>
<br>
<a href="index.php?page=cart&remove=<?=$product['id']?>" class="remove">Remove</a>
</td>
<td class="price">$<?=$product['price']?></td>
<td class="quantity">
<input type="number" name="quantity-<?=$product['id']?>" value="<?=$products_in_cart[$product['id']]?>" min="1" max="<?=$product['quantity']?>" placeholder="Quantity" required>
</td>
<td class="price">$<?=$product['price'] * $products_in_cart[$product['id']]?></td>
</tr>
<?php endforeach; ?>
<?php endif; ?>
</tbody>
</table>
<div class="subtotal">
<span class="text">Subtotal</span>
<span class="price">$<?=$subtotal?></span>
</div>
<div class="buttons">
<input type="submit" value="Update" name="update">
<input type="submit" value="Place Order" name="placeorder">
</div>
</form>
</div>
<?=template_footer()?>That's all we must do for the shopping cart page. The customer can now remove products and update quantities.
If you add a few products to the shopping cart and navigate to localhost/shoppingcart/index.php?page=cart, it will resemble the following:
To get the quantity to display in the header, you'll need to edit the functions.php file and add the following code to the template header function:
// Get the number of items in the shopping cart, which will be displayed in the header.
$num_items_in_cart = isset($_SESSION['cart']) ? count($_SESSION['cart']) : 0;
Find:
<i class="fas fa-shopping-cart"></i>Add after:
<span>$num_items_in_cart</span>And now the customer will know how many products they have in their shopping cart at all times, as this will appear on every page.

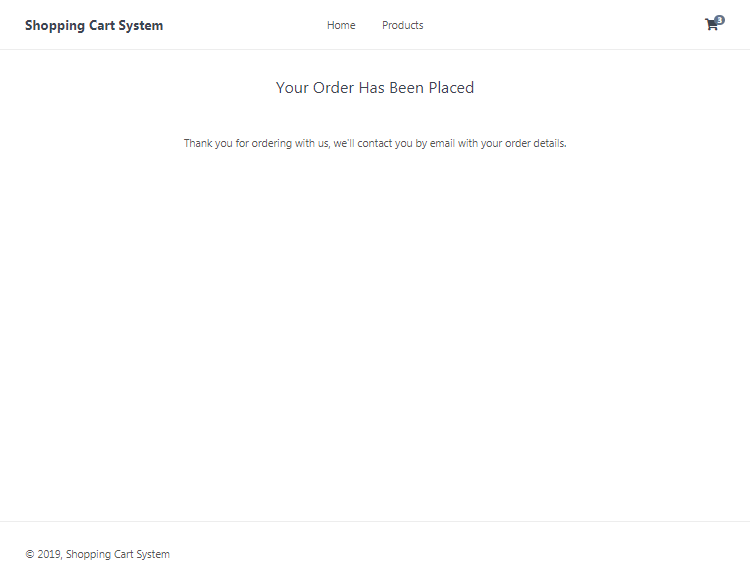
10. Creating the Place Order Page
The place order page will inform the customer that they've placed an order (added products to cart, proceeded to checkout). To reach the place order page, the customers must have products in their shopping cart and have clicked the Place Order button on the shopping cart page.
10.1. Creating the Place Order Template
Edit the placeorder.php file and add the following:
<?=template_header('Place Order')?>

<div class="placeorder content-wrapper">
    <h1>Your Order Has Been Placed</h1>
    <p>Thank you for ordering with us! We'll contact you by email with your order details.</p>
</div>

<?=template_footer()?>
And now, if we add a product to our shopping cart and click the Place Order button, we'll see the following:
Feel free to change the place order message, etc.
If you want to populate the purchased products, you can iterate the session cart variable using the foreach loop, similar to what we did on the shopping cart page.
If you want to remove all the products from the cart, you can simply execute the following:
unset($_SESSION['cart'])The unset() function will destroy our session variable and therefore clear the shopping cart.
Conclusion
Congratulations! You've successfully created a shopping cart system with PHP and MySQL. What next? Consider implementing a checkout page and integrating a payment method, such as PayPal. PayPal provide their own API for developers, which you can leverage. In addition, check out our How to Integrate PayPal with PHP and MySQL guide.
Remember that this is just a base shopping cart system for you to work from, and therefore I don't recommend deploying the system for production until you have made a reasonable amount of security changes and additions. I'd suggest you add your own error handling, payment methods, and validation.
If you enjoyed this tutorial, don't forget to hit the share button and drop a comment, as it will help us create more future content.
Thanks for reading and enjoy coding!
Skip the copy-pasting and get the complete, working project from this tutorial as a free ZIP with a setup guide included. Free for personal and commercial use.
If you would like to support us, consider the advanced shopping cart system below. It will greatly help us create more tutorials and keep our website up and running. The advanced package includes improved code and more features.
— PayPal Integration
— Stripe Integration
— Coinbase Commerce Integration
— Create, edit, and delete products
— Search, sort, and filter orders
— Manage Email Templates
— Edit Settings
— Export & Import Data (CSV, JSON, etc.)
* Advanced package also includes the tutorial source and basic package.
* Instant download after payment.
To learn more about the advanced package, please visit the Advanced Shopping Cart System page.