 Download the full source codeComplete working project · Setup guide included · Free for commercial use
Free ZIP
Download the full source codeComplete working project · Setup guide included · Free for commercial use
Free ZIP
In this tutorial, we'll be developing a login system with Node.js, Express, and MySQL. Node.js will enable us to develop our application with JavaScript using the Express web framework, and we'll be using MySQL to store and retrieve account details (username, password, etc.).
The login system we'll be developing is similar to that of the PHP login system tutorial but isn't going to be as comprehensive.
The Advanced package includes additional features and a download link to the source code. For more detailed information and screenshots, click here.
Contents
1. Why create a login system with Node.js as opposed to PHP?
Node.js is a powerful open-source server environment that leverages JavaScript as its core scripting language.
As more people become aware of Node.js, it is becoming increasingly popular in the development of web applications. Therefore, if you plan to develop applications for the future web, I highly suggest you enhance your knowledge with Node.js.
Node.js's package manager (NPM) already has over 450,000 packages available for you to download. Those numbers alone indicate how fast it's growing.
Did you know?Unlike PHP, Node.js does not depend on Apache or Nginx because Node.js is its own environment.
If you are familiar with JavaScript, you will enjoy developing applications with Node.js and will be able to adapt very easily.
2. Getting Started
Before we start developing our Node.js login system, we must install essential software and packages that our app will depend on and subsequently create the structure for our app.
2.1. What You Will Learn in this Tutorial
- Establishing a connection to a MySQL database and selecting rows using MySQL queries.
- Implementing GET and POST requests with Node.js and Express.
- Designing a login form with CSS3.
- Implementing validation that will ensure the captured data is valid.
- Leveraging sessions, which will determine whether a user is logged in or not.
2.2. Requirements
- MySQL Server >= 5.6
- Node.js
- Express - Install with command: npm install express --save.
- Express Sessions - Install with command: npm install express-session --save.
- MySQL for Node.js - Install with command: npm install mysql --save.
2.3. Setup & File Structure
Follow the below instructions.
- Create a new directory called nodelogin, which can be created anywhere on your environment.
- Open the command line as administrator, and navigate to your new directory with the following command: cd c:\nodeprojects\nodelogin
- Run the command: npm init - it will prompt us to enter a package name, enter: login.
- When it prompts to enter the entry point, enter login.js.
- We need to install the packages listed in the requirements, so we must execute the commands listed in the requirements above.
A new directory will appear called node_modules, which is populated with all the modules we've installed with the commands. It's essential to our app, and therefore deleting it will break it.
File Structure
\-- nodelogin
|-- login.html
|-- login.js
\-- static
|-- style.css
3. Styling the Login Form with CSS
Cascading style sheets will enable us to structure the login form and make it look more appealing. The stylesheet file consists of properties that are associated with HTML elements.
Edit the style.css file and add:
* {
    box-sizing: border-box;
    font-family: -apple-system, BlinkMacSystemFont, "segoe ui", roboto, oxygen, ubuntu, cantarell, "fira sans", "droid sans", "helvetica neue", Arial, sans-serif;
    font-size: 16px;
}
body {
    background-color: #435165;
}
.login {
    width: 400px;
    background-color: #ffffff;
    box-shadow: 0 0 9px 0 rgba(0, 0, 0, 0.3);
    margin: 100px auto;
}
.login h1 {
    text-align: center;
    color: #5b6574;
    font-size: 24px;
    padding: 20px 0 20px 0;
    border-bottom: 1px solid #dee0e4;
}
.login form {
    display: flex;
    flex-wrap: wrap;
    justify-content: center;
    padding-top: 20px;
}
.login form label {
    display: flex;
    justify-content: center;
    align-items: center;
    width: 50px;
    height: 50px;
    background-color: #3274d6;
    color: #ffffff;
}
.login form input[type="password"], .login form input[type="text"] {
    width: 310px;
    height: 50px;
    border: 1px solid #dee0e4;
    margin-bottom: 20px;
    padding: 0 15px;
}
.login form input[type="submit"] {
    width: 100%;
    padding: 15px;
   margin-top: 20px;
    background-color: #3274d6;
    border: 0;
    cursor: pointer;
    font-weight: bold;
    color: #ffffff;
    transition: background-color 0.2s;
}
.login form input[type="submit"]:hover {
  background-color: #2868c7;
    transition: background-color 0.2s;
}
That's all we need to add to our CSS file.
4. Creating the Login Template with HTML
The login form will consist of an HTML form element and input elements, enabling the user to enter and submit their details. There is no need to include Node.js code in the template file.
Edit the login.html file and add:
<!DOCTYPE html>
<html>
	<head>
		<meta charset="utf-8">
		<meta name="viewport" content="width=device-width,minimum-scale=1">
		<title>Login</title>
        <!-- the form awesome library is used to add icons to our form -->
		<link rel="stylesheet" href="https://use.fontawesome.com/releases/v5.7.1/css/all.css">
        <!-- include the stylesheet file -->
        <link href="/style.css" rel="stylesheet" type="text/css">
	</head>
	<body>
		<div class="login">
			<h1>Login</h1>
			<form action="/auth" method="post">
				<label for="username">
					<!-- font awesome icon -->
					<i class="fas fa-user"></i>
				</label>
				<input type="text" name="username" placeholder="Username" id="username" required>
				<label for="password">
					<i class="fas fa-lock"></i>
				</label>
				<input type="password" name="password" placeholder="Password" id="password" required>
				<input type="submit" value="Login">
			</form>
		</div>
	</body>
</html>
Let's narrow down what each element will do.
-
Form — we need to use a form element to submit data to our Node.js app. The action attribute will point to our auth route (POST request), which we will create later on.
- Input (username) — will capture the user's username. In addition, the required attribute is declared to ensure the field is mandatory.
- Input (password) — will capture the user's password.
- Input (submit) — button that will be used to submit the form.
The login template will enable users to submit their details, and we'll use Node.js to validate the details. We'll be using a POST request to capture the details, which we can then handle in our Node.js auth route.
5. Creating the Login App with Node.js
Now that we have all our basics finished, we can finally start developing our app with Node.js.
To use a module in a Node.js app, we need to include it. Therefore, we need to add the following variables to our login.js file:
const mysql = require('mysql');
const express = require('express');
const session = require('express-session');
const path = require('path');
The above code will include the MySQL, Express, Express-session, and Path modules that are associated with the variables we have declared.
Before we implement the database connection code, we need a database to connect to. Therefore, we must execute the below SQL statement either with the command line or your preferred MySQL Editor. Make sure the MySQL server is running on port 3306, otherwise the script will fail to connect to the database.
CREATE DATABASE IF NOT EXISTS `nodelogin` DEFAULT CHARACTER SET utf8 COLLATE utf8_general_ci;
USE `nodelogin`;

CREATE TABLE IF NOT EXISTS `accounts` (
  `id` int(11) NOT NULL AUTO_INCREMENT,
  `username` varchar(50) NOT NULL,
  `password` varchar(255) NOT NULL,
  `email` varchar(100) NOT NULL,
  PRIMARY KEY (`id`)
) ENGINE=InnoDB AUTO_INCREMENT=2 DEFAULT CHARSET=utf8;

INSERT INTO `accounts` (`id`, `username`, `password`, `email`) VALUES (1, 'test', 'test', 'test@test.com');
The above SQL statement will create the database (nodelogin) and create the accounts table. In addition, it will insert a test account that we can use for testing purposes.
We can now connect to our database with the following code:
const connection = mysql.createConnection({
	host     : 'localhost',
	user     : 'root',
	password : '',
	database : 'nodelogin'
});
The connection details must reflect your database credentials. In most local environments, the default username is root, so you might not have to change anything, but in production mode, we highly suggest you change the default username for MySQL and set a strong password.
Express is what we'll use for our web application, which includes packages that are essential for server-side web development, such as sessions and handling HTTP requests.
Add the following code to initialize express:
const app = express();After we need to associate the modules we'll be using with Express:
app.use(session({
	secret: 'secret',
	resave: true,
	saveUninitialized: true
}));
app.use(express.json());
app.use(express.urlencoded({ extended: true }));
app.use(express.static(path.join(__dirname, 'static')));
Make sure to update the secret code variable when declaring the session function, as it will used to secure the session data. We'll be using sessions to determine whether the user is logged in or not. The json and urlencoded methods will extract the form data from our login.html file.
Security TipWhen deploying your project to a production server, ensure you're leveraging SSL, as it will help secure the browser cookies that are associated with sessions.
After, we need to declare the login route that will output our login.html file to the client using a GET request.
Add the following:
// http://localhost:3000/
app.get('/', function(request, response) {
	// Render login template
	response.sendFile(path.join(__dirname + '/login.html'));
});
When the client establishes a new connection to our Node.js server, it will output the login.html file.
Next, we need to add a new route that will authenticate the user.
Add the following:
// http://localhost:3000/auth
app.post('/auth', function(request, response) {
	// Capture the input fields
	let username = request.body.username;
	let password = request.body.password;
	// Ensure the input fields exists and are not empty
	if (username && password) {
		// Execute SQL query that'll select the account from the database based on the specified username and password
		connection.query('SELECT * FROM accounts WHERE username = ? AND password = ?', [username, password], function(error, results, fields) {
			// If there is an issue with the query, output the error
			if (error) throw error;
			// If the account exists
			if (results.length > 0) {
				// Authenticate the user
				request.session.loggedin = true;
				request.session.username = username;
				// Redirect to home page
				response.redirect('/home');
			} else {
				response.send('Incorrect Username and/or Password!');
			}
			response.end();
		});
	} else {
		response.send('Please enter Username and Password!');
		response.end();
	}
});
The above code will create our authentication route using the POST method, capturing and validating our input fields when the user submits the login form.
Remember the action we declared for our form in the login template? We are using the same value for the path in our new route, so when the user submits the form, the /auth will be appended to the URL.
When the user submits the form, the code will check if both input fields are not empty and will subsequently select the account from our accounts table in our MySQL database. The user is successfully authenticated and redirected to the home page if the account exists. If not, they will encounter an error message.
The loggedin session variable will be used to determine whether the user is logged in or not, and the username variable we can use to output on the home page.
We can finally create the home route that will output the user's username.
Add the following:
// http://localhost:3000/home
app.get('/home', function(request, response) {
	// If the user is loggedin
	if (request.session.loggedin) {
		// Output username
		response.send('Welcome back, ' + request.session.username + '!');
	} else {
		// Not logged in
		response.send('Please login to view this page!');
	}
	response.end();
});
Finally, our Node.js server needs to listen on a port, so for testing purposes, we can use port 3000.
Add the following:
app.listen(3000);Ideally, when you deploy your login system to a production server, you would want your server to listen on port 80, so you don't have to specify the port number in the URL.
To start our Node.js app, we can execute the command node login.js in the command line. If we navigate to http://localhost:3000/ in our browser, we should see the login form, which should look like the following:
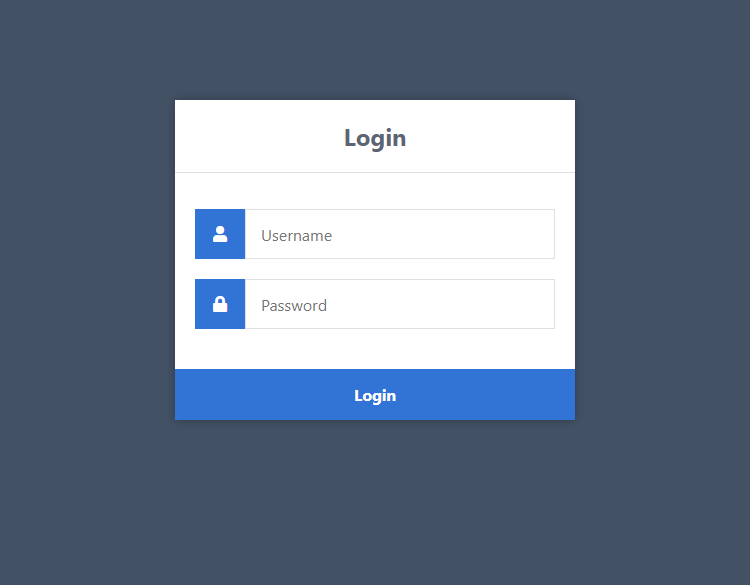
You can proceed to log in with the test account (username: test, password: test). If successful, you will see the username displayed on the screen.
Full login.js Source
const mysql = require('mysql');
const express = require('express');
const session = require('express-session');
const path = require('path');

const connection = mysql.createConnection({
	host     : 'localhost',
	user     : 'root',
	password : '',
	database : 'nodelogin'
});

const app = express();

app.use(session({
	secret: 'secret',
	resave: true,
	saveUninitialized: true
}));
app.use(express.json());
app.use(express.urlencoded({ extended: true }));
app.use(express.static(path.join(__dirname, 'static')));

// http://localhost:3000/
app.get('/', function(request, response) {
	// Render login template
	response.sendFile(path.join(__dirname + '/login.html'));
});

// http://localhost:3000/auth
app.post('/auth', function(request, response) {
	// Capture the input fields
	let username = request.body.username;
	let password = request.body.password;
	// Ensure the input fields exists and are not empty
	if (username && password) {
		// Execute SQL query that'll select the account from the database based on the specified username and password
		connection.query('SELECT * FROM accounts WHERE username = ? AND password = ?', [username, password], function(error, results, fields) {
			// If there is an issue with the query, output the error
			if (error) throw error;
			// If the account exists
			if (results.length > 0) {
				// Authenticate the user
				request.session.loggedin = true;
				request.session.username = username;
				// Redirect to home page
				response.redirect('/home');
			} else {
				response.send('Incorrect Username and/or Password!');
			}
			response.end();
		});
	} else {
		response.send('Please enter Username and Password!');
		response.end();
	}
});

// http://localhost:3000/home
app.get('/home', function(request, response) {
	// If the user is loggedin
	if (request.session.loggedin) {
		// Output username
		response.send('Welcome back, ' + request.session.username + '!');
	} else {
		// Not logged in
		response.send('Please login to view this page!');
	}
	response.end();
});

app.listen(3000);
Conclusion
You should now have a basic understanding of how a login system works and the fundamentals involved. While we don't recommend deploying the system to a production environment, you can, however, use it as a base in your development projects.
What next? Consider implementing security techniques (password hashing, prepared statements, CSRF, etc.) and the registration aspect utilizing the methods used to create the login system.
If you've enjoyed reading this tutorial, please share it on social media, as it will help improve our content and provide more quality tutorials! We appreciate your support.
Enjoy coding, and thank you for reading!
Skip the copy-pasting and get the complete, working project from this tutorial as a free ZIP with a setup guide included. Free for personal and commercial use.
If you would like to support us, consider the advanced secure login & registration system below. It will greatly help us create more tutorials and keep our website up and running. The advanced package includes improved code and more features.
— View Dashboard
— Create, edit, and delete accounts
— Search, sort, and filter accounts
— Manage Email Templates
— Edit Settings
* Advanced package also includes the tutorial source and basic package.
* Instant download after payment.
To learn more about the advanced package, please visit the Advanced Secure Login & Registration System page.