 Download the full source code — freeComplete working project · Setup guide included · Free for commercial use
Free ZIP
Download the full source code — freeComplete working project · Setup guide included · Free for commercial use
Free ZIP
In this tutorial, we'll be creating a complete login and registration system with Python Flask and MySQL.
Python is currently taking the web development scene by storm, growing consistently every year. It has a low learning curve and therefore is much easier to adapt to compared to other known languages (Node.js, PHP, etc.). In addition, Python is relatively new, so it would be advantageous to start learning immediately.
The Advanced package includes additional features and a download link to the source code.
Contents
1. Getting Started
There are a few steps we need to take before we create our Python login and registration system. We need to download and set up Python and install the packages that our app will depend on.
1.1. What You Will Learn in this Tutorial
- Form Design — Design a login and registration form with HTML5 and CSS3.
- Templates — Create Flask templates with HTML and Python.
- Basic Validation — Validating form data that is sent to the server (username, password, and email).
- Session Management — Initialize sessions and store retrieved database results.
- MySQL Queries — Select and insert records from/in our database table.
- Routes — Routing will enable us to associate the URLs with the functions that we will create.
1.2. Requirements
- Download and install Python, for this tutorial I'll be using Python 3.11.3. Make sure to check the Add Python to PATH option on the installation setup screen.
- Download and install MySQL Community Server and MySQL Workbench. You can skip this step if you already have a MySQL server installed.
- Open command line and Install Python Flask with the command: pip install flask
- Install Flask-MySQLdb with the command: pip install flask-mysqldb
1.3. File Structure & Setup
We need to create our project directory and files. You can create the directory anywhere on your computer as long as Python can access it. Create the directories and files below.
File Structure
\-- pythonlogin
|-- main.py
\-- static
|-- style.css
\-- templates
|-- index.html
|-- register.html
|-- home.html
|-- profile.html
|-- layout.html
Each file will contain the following:
- main.py — This will be our main project file, which will contain all our Python code (Routes, MySQL connection, validation, etc.).
- index.html — The login form template created with HTML5 and CSS3.
- register.html — The registration form template created with HTML5 and CSS3.
- home.html — The home template which is restricted to logged-in users.
- profile.html — The profile template which is restricted to logged-in users. The user's details will be populated on this page.
- layout.html — The layout template for the home and profile templates.
- style.css — The CSS3 stylesheet for our login and registration system.
The below instruction will start your web server (Windows):
- Make sure your MySQL server is up and running. It should have automatically started if you installed it via the installer. In addition, ensure MySQL is running on port 3306 otherwise you'll encounter connection errors.
- Open Command Prompt and navigate to your project directory. You can do this with the command cd c:\your_project_folder_destination on Windows.
- Run command: set FLASK_APP=main.py
- Run command: set FLASK_DEBUG=1
- Run command: flask run
Debug mode will enable us to edit our files without constantly restarting the web server.
2. Creating the Database and setting-up Tables
MySQL Workbench is a GUI for managing our databases. Follow the instructions below to get started.
- Open MySQL Workbench
- Enter your MySQL details
- Click Test Connection. If successful, you can click OK
- Open your connection
- Execute the following SQL statement:
CREATE DATABASE IF NOT EXISTS `pythonlogin` DEFAULT CHARACTER SET utf8 COLLATE utf8_general_ci;
USE `pythonlogin`;

CREATE TABLE IF NOT EXISTS `accounts` (
	`id` int(11) NOT NULL AUTO_INCREMENT,
  	`username` varchar(50) NOT NULL,
  	`password` varchar(255) NOT NULL,
  	`email` varchar(100) NOT NULL,
    PRIMARY KEY (`id`)
) ENGINE=InnoDB AUTO_INCREMENT=2 DEFAULT CHARSET=utf8;

INSERT INTO `accounts` (`id`, `username`, `password`, `email`) VALUES (1, 'test', '0ef15de6149819f2d10fc25b8c994b574245f193', 'test@test.com');
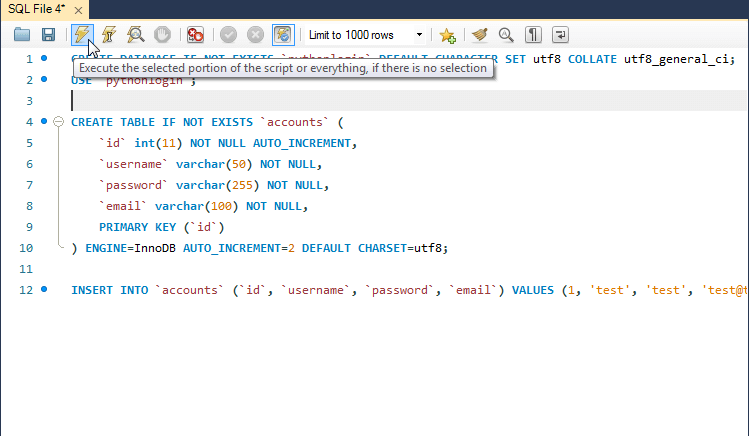
The above SQL statement will create our database pythonlogin with the table accounts, along with a test account that we can use for testing purposes.
3. Creating the Stylesheet (CSS3)
Edit the style.css file and add the following:
* {
  	box-sizing: border-box;
  	font-family: -apple-system, BlinkMacSystemFont, "segoe ui", roboto, oxygen, ubuntu, cantarell, "fira sans", "droid sans", "helvetica neue", Arial, sans-serif;
  	font-size: 16px;
  	-webkit-font-smoothing: antialiased;
  	-moz-osx-font-smoothing: grayscale;
}
body {
  	background-color: #435165;
  	margin: 0;
}
.login, .register {
  	width: 400px;
  	background-color: #ffffff;
  	box-shadow: 0 0 9px 0 rgba(0, 0, 0, 0.3);
  	margin: 100px auto;
}
.login h1, .register h1 {
  	text-align: center;
  	color: #5b6574;
  	font-size: 24px;
  	padding: 20px 0 20px 0;
  	border-bottom: 1px solid #dee0e4;
}
.login .links, .register .links {
  	display: flex;
  	padding: 0 15px;
}
.login .links a, .register .links a {
  	color: #adb2ba;
  	text-decoration: none;
  	display: inline-flex;
  	padding: 0 10px 10px 10px;
  	font-weight: bold;
}
.login .links a:hover, .register .links a:hover {
  	color: #9da3ac;
}
.login .links a.active, .register .links a.active {
  	border-bottom: 3px solid #3274d6;
  	color: #3274d6;
}
.login form, .register form {
  	display: flex;
  	flex-wrap: wrap;
  	justify-content: center;
  	padding-top: 20px;
}
.login form label, .register form label {
  	display: flex;
  	justify-content: center;
  	align-items: center;
  	width: 50px;
  	height: 50px;
  	background-color: #3274d6;
  	color: #ffffff;
}
.login form input[type="password"], .login form input[type="text"], .login form input[type="email"], .register form input[type="password"], .register form input[type="text"], .register form input[type="email"] {
  	width: 310px;
  	height: 50px;
  	border: 1px solid #dee0e4;
  	margin-bottom: 20px;
  	padding: 0 15px;
}
.login form input[type="submit"], .register form input[type="submit"] {
  	width: 100%;
  	padding: 15px;
  	margin-top: 20px;
  	background-color: #3274d6;
  	border: 0;
  	cursor: pointer;
  	font-weight: bold;
  	color: #ffffff;
  	transition: background-color 0.2s;
}
.login form input[type="submit"]:hover, .register form input[type="submit"]:hover {
  	background-color: #2868c7;
  	transition: background-color 0.2s;
}
.navtop {
  	background-color: #2f3947;
  	height: 60px;
  	width: 100%;
  	border: 0;
}
.navtop div {
  	display: flex;
  	margin: 0 auto;
  	width: 1000px;
  	height: 100%;
}
.navtop div h1, .navtop div a {
  	display: inline-flex;
  	align-items: center;
}
.navtop div h1 {
  	flex: 1;
  	font-size: 24px;
  	padding: 0;
 	margin: 0;
  	color: #eaebed;
  	font-weight: normal;
}
.navtop div a {
  	padding: 0 20px;
  	text-decoration: none;
  	color: #c1c4c8;
  	font-weight: bold;
}
.navtop div a i {
  	padding: 2px 8px 0 0;
}
.navtop div a:hover {
  	color: #eaebed;
}
body.loggedin {
  	background-color: #f3f4f7;
}
.content {
  	width: 1000px;
  	margin: 0 auto;
}
.content h2 {
  	margin: 0;
  	padding: 25px 0;
  	font-size: 22px;
  	border-bottom: 1px solid #e0e0e3;
  	color: #4a536e;
}
.content > p, .content > div {
  	box-shadow: 0 0 5px 0 rgba(0, 0, 0, 0.1);
  	margin: 25px 0;
  	padding: 25px;
	background-color: #fff;
}
.content > p table td, .content > div table td {
	padding: 5px;
}
.content > p table td:first-child, .content > div table td:first-child {
	font-weight: bold;
	color: #4a536e;
	padding-right: 15px;
}
.content > div p {
	padding: 5px;
	margin: 0 0 10px 0;
}
The above stylesheet will structure our pages and provide an innovative experience for our users. Feel free to customize the stylesheet (change text color, font sizes, content width, etc.).
4. Creating the Login System
We can finally start coding with Python! What we'll do in this section is create the login template, connect to our MySQL database, implement login authentication, and define session variables.
The first thing we need to do is import the packages we're going to use, edit the main.py file, and add the following:
from flask import Flask, render_template, request, redirect, url_for, session
from flask_mysqldb import MySQL
import MySQLdb.cursors
import MySQLdb.cursors, re, hashlib
Now that we have imported all the packages we're going to utilize, we need to create the MySQL and app-related variables and configure the MySQL connection details.
Add after:
app = Flask(__name__)

# Change this to your secret key (it can be anything, it's for extra protection)
app.secret_key = 'your secret key'

# Enter your database connection details below
app.config['MYSQL_HOST'] = 'localhost'
app.config['MYSQL_USER'] = 'root'
app.config['MYSQL_PASSWORD'] = ''
app.config['MYSQL_DB'] = 'pythonlogin'

# Intialize MySQL
mysql = MySQL(app)
Be sure to configure the MySQL variables to reflect your MySQL details.
Now, we can proceed to create the login page. To do that, we need to create a new route. Routes will enable us to associate our functions with a particular URL.
Add after:
# localhost:5000/pythonlogin/ - the following will be our login page, which will use both GET and POST requests
@app.route('/pythonlogin/', methods=['GET', 'POST'])
def login():
    # Output message if something goes wrong...
    msg = ''
    return render_template('index.html', msg='')
4.1 Creating the Login Template
Edit the index.html file and add:
<!DOCTYPE html>
<html>
	<head>
		<meta charset="utf-8">
		<title>Login</title>
		<link rel="stylesheet" href="{{ url_for('static', filename='style.css') }}">
		<link rel="stylesheet" href="https://use.fontawesome.com/releases/v5.7.1/css/all.css">
	</head>
	<body>
		<div class="login">
			<h1>Login</h1>
			<div class="links">
				<a href="{{ url_for('login') }}" class="active">Login</a>
				<a href="#">Register</a>
			</div>
			<form action="{{ url_for('login') }}" method="post">
				<label for="username">
					<i class="fas fa-user"></i>
				</label>
				<input type="text" name="username" placeholder="Username" id="username" required>
				<label for="password">
					<i class="fas fa-lock"></i>
				</label>
				<input type="password" name="password" placeholder="Password" id="password" required>
				<div class="msg">{{ msg }}</div>
				<input type="submit" value="Login">
			</form>
		</div>
	</body>
</html>
As you can see with the login template, we create the form along with the input fields: username and password. The form's method is set to post, which determines the type of request we want to send to our server. We'll be using a POST request to send the form data.
If we navigate to localhost:5000/pythonlogin/ in our web browser, it will look like the following:
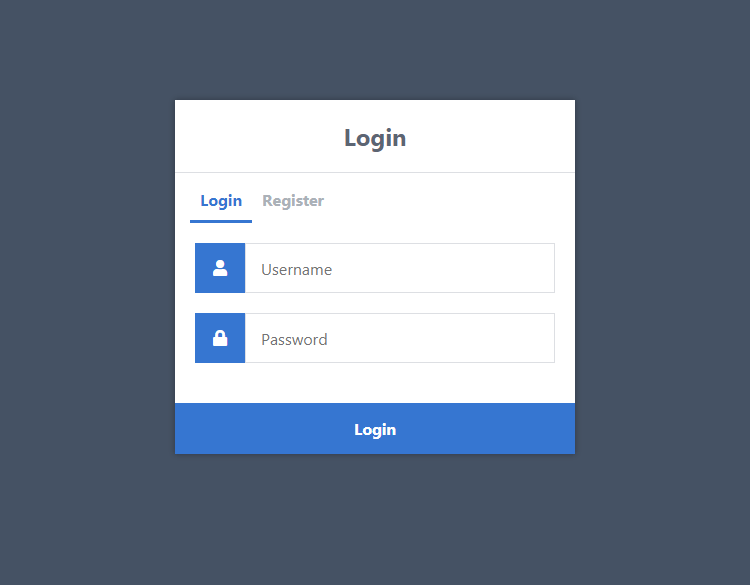
If you click the Login button, nothing will happen or will return an error. That's because we haven't implemented the code that handles the POST request.
4.2 Authenticating Users with Python
Now we need to go back to our main.py file and add the authentication code to our route method that we implemented.
After:
def login():
    # Output a message if something goes wrong...
    msg = ''
Add:
    # Check if "username" and "password" POST requests exist (user submitted form)
    if request.method == 'POST' and 'username' in request.form and 'password' in request.form:
        # Create variables for easy access
        username = request.form['username']
        password = request.form['password']
        # Retrieve the hashed password
        hash = password + app.secret_key
        hash = hashlib.sha1(hash.encode())
        password = hash.hexdigest()
With the code above, we use an if statement to check if the requested method is POST and check if the username and password variables exist in the form request. If they both exist, the username and password variables will be created, which will be associated with the form variables.
In addition, we're leveraging the hashlib module to create a hashed password, which is good practice and will help prevent the original password from being exposed.
Add after:
        # Check if account exists using MySQL
        cursor = mysql.connection.cursor(MySQLdb.cursors.DictCursor)
        cursor.execute('SELECT * FROM accounts WHERE username = %s AND password = %s', (username, password,))
        # Fetch one record and return the result
        account = cursor.fetchone()
The code above will execute a SQL query that will retrieve the account details from our accounts table in our MySQL database. The username and password variables are associated with this query, as that is what we will use to find the account.
Add after:
        # If account exists in accounts table in out database
        if account:
            # Create session data, we can access this data in other routes
            session['loggedin'] = True
            session['id'] = account['id']
            session['username'] = account['username']
            # Redirect to home page
            return 'Logged in successfully!'
        else:
            # Account doesnt exist or username/password incorrect
            msg = 'Incorrect username/password!'
The code above will determine if the account exists. If it does, the session variables are declared. These session variables will be remembered for the user as they will be used to determine whether the user is logged in or not.
Session variables basically act like browser cookies. They are stored on the server as opposed to the user's browser.
If the account doesn't exist, we can simply output the error on the login form.
Your login route should look like the following:
@app.route('/pythonlogin/', methods=['GET', 'POST'])
def login():
    # Output a message if something goes wrong...
    msg = ''
    # Check if "username" and "password" POST requests exist (user submitted form)
    if request.method == 'POST' and 'username' in request.form and 'password' in request.form:
        # Create variables for easy access
        username = request.form['username']
        password = request.form['password']
        # Check if account exists using MySQL
        cursor = mysql.connection.cursor(MySQLdb.cursors.DictCursor)
        cursor.execute('SELECT * FROM accounts WHERE username = %s AND password = %s', (username, password,))
        # Fetch one record and return result
        account = cursor.fetchone()
        # If account exists in accounts table in out database
        if account:
            # Create session data, we can access this data in other routes
            session['loggedin'] = True
            session['id'] = account['id']
            session['username'] = account['username']
            # Redirect to home page
            return 'Logged in successfully!'
        else:
            # Account doesnt exist or username/password incorrect
            msg = 'Incorrect username/password!'
    # Show the login form with message (if any)
    return render_template('index.html', msg=msg)
To make sure everything is working correctly, navigate to localhost:5000/pythonlogin/ and input "test" in both the username and password fields, and then click the Login button. You should receive a message that outputs "Logged in successfully!".
4.3 Creating the Logout Script
For a user to log out, all we have to do is remove the session variables that were created when the user logged in, which is where the pop() method will come in handy.
Add the following code to the main.py file:
# localhost:5000/python/logout - this will be the logout page
@app.route('/pythonlogin/logout')
def logout():
    # Remove session data, this will log the user out
   session.pop('loggedin', None)
   session.pop('id', None)
   session.pop('username', None)
   # Redirect to login page
   return redirect(url_for('login'))
The above code will remove each session variable associated with the user. Without these session variables, the user cannot be logged in. Subsequently, the user is redirected to the login page.
We can logout by navigating to the following URL: localhost:5000/pythonlogin/logout
5. Creating the Registration System
We need a registration system that users can use to register on our app. What we'll do in this section is create a new register route and create the registration template, along with the registration form, which will consist of input fields, submit button, etc.
5.1 Creating the Registration Template
Edit the register.html file and add:
<!DOCTYPE html>
<html>
<head>
<meta charset="utf-8">
<title>Register</title>
<link rel="stylesheet" href="{{ url_for('static', filename='style.css') }}">
<link rel="stylesheet" href="https://use.fontawesome.com/releases/v5.7.1/css/all.css">
</head>
<body>
<div class="register">
<h1>Register</h1>
<div class="links">
<a href="{{ url_for('login') }}">Login</a>
<a href="{{ url_for('register') }}" class="active">Register</a>
</div>
<form action="{{ url_for('register') }}" method="post" autocomplete="off">
<label for="username">
<i class="fas fa-user"></i>
</label>
<input type="text" name="username" placeholder="Username" id="username" required>
<label for="password">
<i class="fas fa-lock"></i>
</label>
<input type="password" name="password" placeholder="Password" id="password" required>
<label for="email">
<i class="fas fa-envelope"></i>
</label>
<input type="email" name="email" placeholder="Email" id="email" required>
<div class="msg">{{ msg }}</div>
<input type="submit" value="Register">
</form>
</div>
</body>
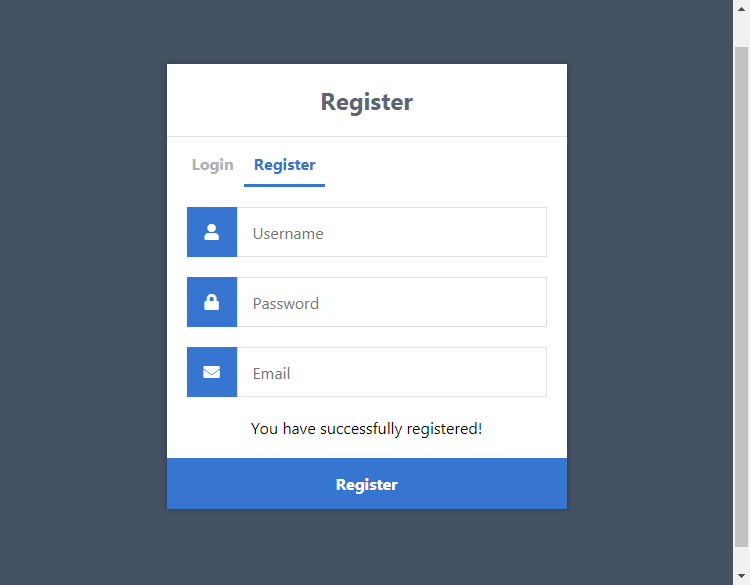
</html>The HTML template above we'll use to register users. It's identical to the login template but also includes the Email input field.
The form's action attribute is associated with the "register" route, as we'll use this route to handle the POST request.
5.2 Registering Users with Python
Now that we have our template created, we can proceed to create the "register" route, which will handle the POST request and insert a new account into our accounts table, but only if the submitted fields are valid.
Go back to the main.py file and add the following:
# localhost:5000/pythinlogin/register - this will be the registration page, we need to use both GET and POST requests
@app.route('/pythonlogin/register', methods=['GET', 'POST'])
def register():
    # Output message if something goes wrong...
    msg = ''
    # Check if "username", "password" and "email" POST requests exist (user submitted form)
    if request.method == 'POST' and 'username' in request.form and 'password' in request.form and 'email' in request.form:
        # Create variables for easy access
        username = request.form['username']
        password = request.form['password']
        email = request.form['email']
    elif request.method == 'POST':
        # Form is empty... (no POST data)
        msg = 'Please fill out the form!'
    # Show registration form with message (if any)
    return render_template('register.html', msg=msg)
We create the "register" route and implement validation that will check if all the form fields exist. If they don't, then output a simple error.
After:
email = request.form['email']Add:
        # Check if account exists using MySQL
        cursor = mysql.connection.cursor(MySQLdb.cursors.DictCursor)
        cursor.execute('SELECT * FROM accounts WHERE username = %s', (username,))
        account = cursor.fetchone()
        # If account exists show error and validation checks
        if account:
            msg = 'Account already exists!'
        elif not re.match(r'[^@]+@[^@]+\.[^@]+', email):
            msg = 'Invalid email address!'
        elif not re.match(r'[A-Za-z0-9]+', username):
            msg = 'Username must contain only characters and numbers!'
        elif not username or not password or not email:
            msg = 'Please fill out the form!'
        else:
            # Hash the password
            hash = password + app.secret_key
            hash = hashlib.sha1(hash.encode())
            password = hash.hexdigest()
            # Account doesn't exist, and the form data is valid, so insert the new account into the accounts table
            cursor.execute('INSERT INTO accounts VALUES (NULL, %s, %s, %s)', (username, password, email,))
            mysql.connection.commit()
            msg = 'You have successfully registered!'
The above code will select an account with the submitted username and password fields. If the account doesn't exist, we can proceed to validate the input data. Validation will check if the submitted email is valid and check if the username contains only letters and numbers.
Coding Tip The %s placeholder in the query string will help prevent SQL injection, as their bound values will be escaped before insertion.
Subsequently, the code will insert a new account into our accounts tables.
To test that it is working correctly, navigate to localhost:5000/pythonlogin/register and fill out the form and click the Register button. You should receive the following response:
Now we can go back to our index.html file and change this line:
<a href="#">Register</a>To:
<a href="{{ url_for('register') }}">Register</a>Users can now register and log in to our app. Next, we'll create a basic home page for logged-in users.
6. Creating the Home Page
The home page will be restricted to logged-in users only. Non-registered users cannot access this page. You can adapt this page and create more pages.
Edit the main.py file and add the following:
# localhost:5000/pythinlogin/home - this will be the home page, only accessible for logged in users
@app.route('/pythonlogin/home')
def home():
    # Check if the user is logged in
    if 'loggedin' in session:
        # User is loggedin show them the home page
        return render_template('home.html', username=session['username'])
    # User is not loggedin redirect to login page
    return redirect(url_for('login'))
The above code will create the home route function. If the user is logged in, they will have access to the home page. If not, they will be redirected to the login page.
Edit the home.html file and add the following:
{% extends 'layout.html' %}

{% block title %}Home{% endblock %}

{% block content %}
<h2>Home Page</h2>
<p>Welcome back, {{ username }}!</p>
{% endblock %}
We also need to create the layout for our logged-in pages. Edit the layout.html file and add:
<!DOCTYPE html>
<html>
	<head>
		<meta charset="utf-8">
		<title>{% block title %}{% endblock %}</title>
		<link rel="stylesheet" href="{{ url_for('static', filename='style.css') }}">
		<link rel="stylesheet" href="https://use.fontawesome.com/releases/v5.7.1/css/all.css">
	</head>
	<body class="loggedin">
		<nav class="navtop">
			<div>
				<h1>Website Title</h1>
                <a href="{{ url_for('home') }}"><i class="fas fa-home"></i>Home</a>
				<a href="{{ url_for('profile') }}"><i class="fas fa-user-circle"></i>Profile</a>
				<a href="{{ url_for('logout') }}"><i class="fas fa-sign-out-alt"></i>Logout</a>
			</div>
		</nav>
		<div class="content">
			{% block content %}{% endblock %}
		</div>
	</body>
</html>
Now, we can easily extend the same layout for both the home and profile pages.
Currently, when a user logs in, there will be a basic output message. We can now change that to redirect the user to our new home page instead. Find the following code in the login route function:
return 'Logged in successfully!'Replace with:
return redirect(url_for('home'))The user will now be redirected to the home page when they log in. If we enter the test details into the login form and click the Login button, we will see the following:
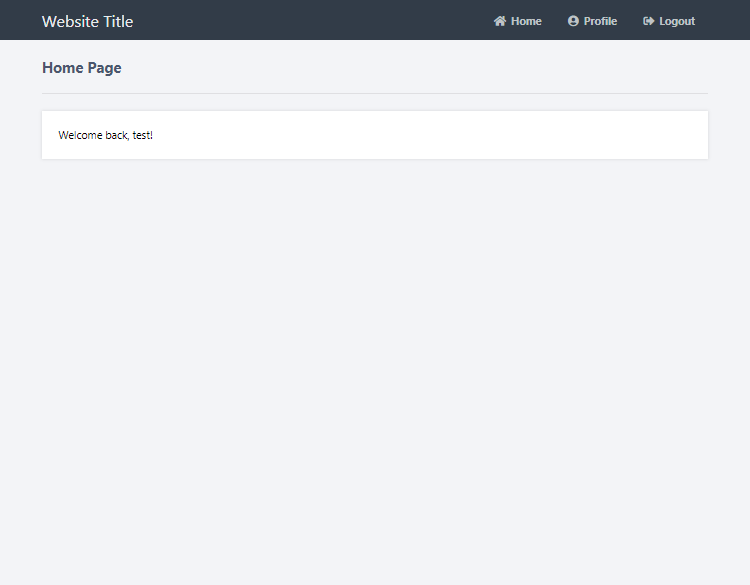
It's just a simple home page that will output the username. You can implement your own code later.
Next, we'll create the profile page and populate the user's details.
7. Creating the Profile Page
The profile page will populate all details associated with the account (username, password, and email).
Add the following route to the main.py file:
# localhost:5000/pythinlogin/profile - this will be the profile page, only accessible for logged in users
@app.route('/pythonlogin/profile')
def profile():
    # Check if the user is logged in
    if 'loggedin' in session:
        # We need all the account info for the user so we can display it on the profile page
        cursor = mysql.connection.cursor(MySQLdb.cursors.DictCursor)
        cursor.execute('SELECT * FROM accounts WHERE id = %s', (session['id'],))
        account = cursor.fetchone()
        # Show the profile page with account info
        return render_template('profile.html', account=account)
    # User is not logged in redirect to login page
    return redirect(url_for('login'))
The above code will create the profile route and retrieve all the account details from the database, but only if the user is logged in.
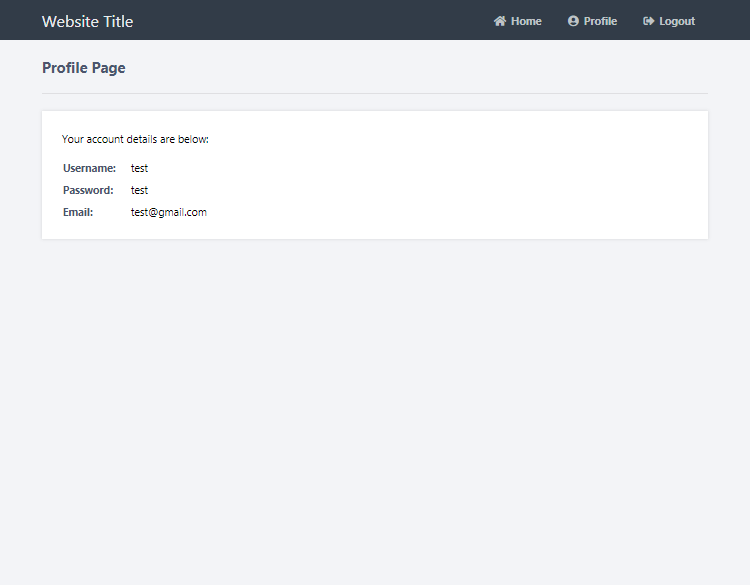
Edit the profile.html file and add:
{% extends 'layout.html' %}

{% block title %}Profile{% endblock %}

{% block content %}
<h2>Profile Page</h2>
<div>
    <p>Your account details are below:</p>
    <table>
        <tr>
            <td>Username:</td>
            <td>{{ account['username'] }}</td>
        </tr>
        <tr>
            <td>Password:</td>
            <td>******</td>
        </tr>
        <tr>
            <td>Email:</td>
            <td>{{ account['email'] }}</td>
        </tr>
    </table>
</div>
{% endblock %}
The above code will extend the layout (layout.html) file that we created previously. If you navigate to the profile page, it will look like the following:
That's basically it for the home and profile pages. The Advanced package includes the edit profile feature that will enable the user to change their username, password, and email.
Conclusion
Congratulations! You've successfully created your own login and registration system with Python Flask and MySQL. You're free to use the source code from this tutorial in your Python apps.
Please remember, the code should not be used for production purposes as there are a number of components that are essential for such purposes (WSGI server integration, etc.).
If you've enjoyed reading this tutorial, don't forget to hit the share button and drop a comment below, as it will help us create more future content.
Enjoy coding, and thanks for reading!
Skip the copy-pasting — get the complete, working project from this tutorial as a free ZIP with a setup guide included. Free for personal and commercial use.
If you would like to support us, consider the advanced secure login & registration system below. It will greatly help us create more tutorials and keep our website up and running. The advanced package includes improved code and more features.
— View Dashboard
— Create, edit, and delete accounts
— Search, sort, and filter accounts
— Manage Email Templates
— Edit Settings
* Advanced package also includes the tutorial source and basic package.
* Instant download after payment.
To learn more about the advanced package, please visit the Advanced Secure Login & Registration System page.