 Download the full source codeComplete working project · Setup guide included · Free for commercial use
Free ZIP
Download the full source codeComplete working project · Setup guide included · Free for commercial use
Free ZIP
In this tutorial, I'll teach you how to leverage RSS news feeds and implement them on your own websites. You'll learn how to populate RSS news feeds using HTML and PHP, create an RSS feed with PHP and MySQL, and capture information from an HTML form to store in a MySQL database.
Technology is transforming around us at an exponentially fast pace, and therefore implementing an RSS news feed could potentially increase relationships with you and your users by staying up to date with the latest information.
Contents
1. What is RSS, and why should I use it?
RSS, also known as Really Simple Syndication, is a technology that enables users to share information from multiple sources in a single location, such as articles on their websites, the latest news, and more. It's useful if you want to subscribe to multiple sources without visiting multiple websites to receive the information.
But wait! Isn't RSS an old technology? Yes, it has been around since the dawn of the web (1999, I believe), but it's still the most convenient way to share information in a single file format (XML).
2. Requirements
To take advantage of the scripts we're going to create, we need a working web server with the following components installed:
- Apache
- PHP >= 5.5
- MySQL >= 5.6 (or MariaDB)
- Code Editor — I recommend Visual Studio Code.
I recommend downloading and installing XAMPP on your testing environment (it includes all of the above). However, I definitely don't suggest using it for your production apps, as it's not built for such purposes.
3. Web Stylesheet (CSS)
The CSS stylesheet will structure the interfaces for all the web pages we'll create in this article.
Create a new file called style.css in your project folder, and add:
* {
  box-sizing: border-box;
  font-family: system-ui, "Segoe UI", Roboto, Helvetica, Arial, sans-serif, "Apple Color Emoji", "Segoe UI Emoji", "Segoe UI Symbol";
  font-size: 16px;
}
body {
  background-color: #FFFFFF;
  margin: 0;
}
.header {
  display: flex;
  align-items: center;
  justify-content: center;
  padding: 80px 0;
}
.header .title {
  margin: 0;
  padding: 0;
  color: #3f4754;
  font-size: 34px;
}
.header .title::after {
  content: " ";
  display: inline-block;
  width: 50%;
  transform: translate(50%, 0);
  border-bottom: 4px solid #dee2e7;
}
.items {
  display: flex;
  flex-flow: column;
  align-items: flex-start;
  max-width: 850px;
  width: 100%;
  margin: 0 auto;
  padding: 0 15px;
}
.items .item {
  display: flex;
  text-decoration: none;
  margin-bottom: 40px;
}
.items .item .image {
  border-radius: 15px;
  max-width: 300px;
}
.items .item .details {
  padding-left: 30px;
}
.items .item .details .title {
  margin: 0;
  padding: 10px 0;
  color: #556071;
  font-size: 24px;
}
.items .item .details .date {
  display: block;
  color: #b3bac6;
  font-size: 14px;
  font-weight: 500;
  padding-top: 10px;
}
.items .item .details .description {
  color: #8792a5;
  font-size: 16px;
  margin: 0;
  padding: 5px 0;
}
.create-news {
  display: flex;
  flex-flow: column;
  width: 100%;
  max-width: 500px;
  margin: 50px auto;
  box-shadow: 0 0 10px rgba(0, 0, 0, 0.1);
  border-radius: 10px;
  overflow: hidden;
  background-color: #fff;
}
.create-news h1 {
  margin: 0;
  padding: 25px 20px;
  font-size: 20px;
  font-weight: 500;
  color: #3f4754;
  border-bottom: 1px solid #eff2f5;
}
.create-news form {
  display: flex;
  flex-flow: column;
  align-items: flex-start;
  padding: 20px;
}
.create-news form label {
  font-weight: 500;
  font-size: 14px;
  color: #74787c;
  padding-bottom: 10px;
}
.create-news form label .required {
  color: #ff1212;
  margin-right: 5px;
}
.create-news form input, .create-news form textarea {
  margin-bottom: 20px;
  width: 100%;
  padding: 10px;
  border: 1px solid #dee1e6;
  border-radius: 4px;
  font-size: 16px;
}
.create-news form input:focus, .create-news form textarea:focus {
  outline: none;
  border-color: #3f4754;
}
.create-news form input::placeholder, .create-news form textarea::placeholder {
  color: #a2a4a8;
}
.create-news form button {
  appearance: none;
  padding: 10px 15px;
  margin-top: 5px;
  border: none;
  border-radius: 4px;
  font-size: 14px;
  font-weight: 500;
  background-color: #167cdb;
  color: #FFFFFF;
  cursor: pointer;
  box-shadow: 0 0 7px rgba(0, 0, 0, 0.15);
  transition: background-color ease 0.2s;
}
.create-news form button:hover {
  background-color: #292e37;
}
.create-news form .msg {
  margin: 0;
  padding: 5px 0 20px 0;
  font-size: 14px;
  font-weight: 500;
}
.create-news form .msg.success {
  color: #07b94c;
}
.create-news form .msg.error {
  color: #be2c2c;
}
That will be enough to make our pages look elegant, but you're free to customize the properties to your liking.
4. RSS Implementation
In this section, we'll cover the fundamentals of implementing RSS news feeds with our web apps. In our case, we'll use PHP (server-side language), MySQL (database integration), and HTML to structure our pages.
4.1. MySQL Database Integration
To integrate MySQL database with our app, we can leverage the PDO interface with PHP, which utilizes various methods to retrieve and store MySQL records.
We can avoid the tedious task of creating a database by executing the following SQL statement with phpMyAdmin (or your preferred database management tool):
CREATE DATABASE IF NOT EXISTS `phpnewsfeed` DEFAULT CHARACTER SET utf8 COLLATE utf8_general_ci;
USE `phpnewsfeed`;

CREATE TABLE `news` (
  `id` int(11) NOT NULL AUTO_INCREMENT,
  `title` varchar(255) NOT NULL,
  `description` varchar(255) NOT NULL,
  `img` varchar(255) NOT NULL,
  `url_link` varchar(255) NOT NULL,
  `published_date` datetime NOT NULL,
  PRIMARY KEY (`id`)
) ENGINE=InnoDB DEFAULT CHARSET=utf8 COLLATE=utf8_general_ci;
That'll create the database phpnewsfeed along with the news table, which will be used to store and retrieve our news. The column details are below.
| Column | Purpose |
| id | The primary key of our table, which will be a unique ID and will auto increment. |
| title | The news title. |
| description | The news description. |
| img | The path of the featured image that'll be uploaded to the server. |
| url_link | The link to the news page or article. |
| published_date | The date and time the news was created. |
Now, we can implement the PHP code to connect to our database. To do that, create a new file called rss.php, and add:
<?php
// Database connection variables
$db_host = 'localhost';
$db_name = 'phpnewsfeed';
$db_user = 'root';
$db_pass = '';
$db_charset = 'utf8';
// Connect to the database using the PDO interface
try {
    $pdo = new PDO('mysql:host=' . $db_host . ';dbname=' . $db_name . ';charset=' . $db_charset, $db_user, $db_pass);
    $pdo->setAttribute(PDO::ATTR_ERRMODE, PDO::ERRMODE_EXCEPTION);
} catch (PDOException $exception) {
    // If there is an error with the connection, stop the script and display the error.
    exit('Failed to connect to database!');
}
// ADD CODE IN NEXT SECTION BELOW
?>
We have declared variables that we can change to reflect our database credentials. If the details are invalid, an error will appear.
That's basically everything we need to do regarding the database integration. In the next section, we'll retrieve the news records from the database and populate them in XML format.
4.2. Generate the RSS News Feed XML File
To generate the XML content, we must first lay out the structure for our RSS document, which contains essential elements required for it to be valid.
But before we do that, let's retrieve the most recent entries from our database. While editing the rss.php file, find:
// ADD CODE IN NEXT SECTION BELOWAdd below:
// Select the ten most recent items from the news database table
$stmt = $pdo->prepare('SELECT * FROM news ORDER BY published_date DESC LIMIT 10');
$stmt->execute();
$news = $stmt->fetchAll(PDO::FETCH_ASSOC);
The above will return the ten most recent entries from our news table in an associative array. When we implement the RSS tags, we can use the PHP foreach loop to iterate the array and populate the items accordingly.
Add below the above code:
// Output header information
header('Content-Type: application/xml; charset=utf-8');
echo '<?xml version="1.0" encoding="utf-8"?>' . PHP_EOL;
We must set the relevant headers for the document to output as XML to the browser. To do that, we can change the content type by executing the header function along with the correct parameters. We must echo the first line of the XML code to prevent the browser from interpreting it as PHP code.
After the PHP closing tag (?>), add:
<rss version="2.0">
    <channel>
        <title>Your Website Name</title>
        <link>https://example.com/</link>
        <description>Short description of your website or feed</description>
        <language>en-us</language>
        <?php foreach ($news as $item): ?>
        <item>
            <title><?=htmlspecialchars($item['title'], ENT_QUOTES)?></title>
            <link><?=htmlspecialchars($item['url_link'], ENT_QUOTES)?></link>
            <description><?=htmlspecialchars($item['description'], ENT_QUOTES)?></description>
            <pubDate><?=date('r', strtotime($item['published_date']))?></pubDate>
            <?php if (!empty($item['img']) && file_exists($item['img'])): ?>
            <enclosure url="https://example.com/<?=htmlspecialchars($item['img'], ENT_QUOTES)?>" type="<?=mime_content_type($item['img'])?>" length="<?=filesize($item['img'])?>" />
            <?php endif; ?>
        </item>
        <?php endforeach; ?>
    </channel>
</rss>
In the above code, we're mixing PHP code with XML. That's because we must iterate and populate our news items using the RSS tags. We have included all the relevant tags and values to incorporate RSS with PHP. Update the channel tags to reflect your details (title, link, description, etc.).
Did You Know? The htmlspecialchars() function converts special characters to HTML entities and therefore will prevent child tags from executing inside the RSS tags.
If we navigate to the file over localhost, it will output the document as XML. That's all we need to implement for this file. The whole concept is to share the document with your users, so they can subscribe to your news feed without visiting your website directly.
4.3. Populate the RSS Feed
In this section, we'll cover the basics of efficiently populating an external RSS news feed with PHP. We'll leverage PHP methods to achieve the desired result.
Create a new file called read.php, and add:
<?php
// Replace with the URL of the RSS feed you want to retrieve
$url = 'http://localhost/phpnewsfeed/rss.php';
// Create a new instance of the DOMDocument class
$dom = new DOMDocument();
// Load the RSS feed
if (!$dom->load($url)) {
    exit('Failed to load RSS feed! Please check the URL!');
}
// Retrieve the items from the RSS feed
$items = $dom->getElementsByTagName('item');
// Below function will convert datetime to time elapsed string.
function time_elapsed_string($datetime, $full = false) {
    $now = new DateTime;
    $ago = new DateTime($datetime);
    $diff = $now->diff($ago);
    $w = floor($diff->d / 7);
    $diff->d -= $w * 7;
    $string = ['y' => 'year','m' => 'month','w' => 'week','d' => 'day','h' => 'hour','i' => 'minute','s' => 'second'];
    foreach ($string as $k => &$v) {
        if ($k == 'w' && $w) {
            $v = $w . ' week' . ($w > 1 ? 's' : '');
        } else if (isset($diff->$k) && $diff->$k) {
            $v = $diff->$k . ' ' . $v . ($diff->$k > 1 ? 's' : '');
        } else {
            unset($string[$k]);
        }
    }
    if (!$full) $string = array_slice($string, 0, 1);
    return $string ? implode(', ', $string) . ' ago' : 'just now';
}
?>
In the above code, we're taking advanced of the DOMDocument class that enables us to manipulate the XML document. The class is awesome because we don't need to parse the XML file ourselves and use various methods, such as Regex, to find specific tags, which can be sophisticated to achieve.
The time_elapsed_string function will convert MySQL DateTime format to an elapsed string (e.g., 15 days ago). It'll be coherent with our feed because we're only retrieving the most recent news.
Make sure to update the $url variable to reflect the URL to your RSS news feed.
Now, we must implement code to iterate the DOM object and declare the HTML elements we'll assign the RSS values.
Add after:
<!DOCTYPE html>
<html>
	<head>
		<meta charset="utf-8">
		<meta name="viewport" content="width=device-width,minimum-scale=1">
		<title>RSS News Feed</title>
		<link href="style.css" rel="stylesheet" type="text/css">
	</head>
	<body>
	    <header class="header">
            <h1 class="title">RSS News Feed</h1>
        </header>
		<main class="items">
			<?php foreach ($items as $item): ?>
            <a href="<?=$item->getElementsByTagName('link')->item(0)->textContent?>" class="item">
                <?php if ($item->getElementsByTagName('enclosure')->length): ?>
                <img src="<?=$item->getElementsByTagName('enclosure')->item(0)->getAttribute('url')?>" alt="<?=$item->getElementsByTagName('title')->item(0)->textContent?>" class="image">
                <?php endif; ?>
                <div class="details">
                    <span class="date" title="<?=$item->getElementsByTagName('pubDate')->item(0)->textContent?>"><?=time_elapsed_string($item->getElementsByTagName('pubDate')->item(0)->textContent)?></span>
                    <h2 class="title"><?=$item->getElementsByTagName('title')->item(0)->textContent?></h2>
                    <p class="description"><?=$item->getElementsByTagName('description')->item(0)->textContent?></p>
                </div>
            </a>
            <?php endforeach; ?>
        </main>
	</body>
</html>
The HTML class attributes reflect the classes declared in our stylesheet file.
If we navigate to the read.php file in our browser, it will look similar to the following:

Assuming you've added records to your database. If no items appear, don't panic! It's because none have yet been saved to our news table. We'll implement the form to save records in the next section.
We can utilize the code from this section to retrieve RSS feeds from any website that promotes them. All we have to do is update the $url variable to point to the RSS feed.
4.4. Submit News to the Database
Finally, we can't populate news without records in our database, so in this section, we'll implement the HTML form to capture the data with PHP and subsequently insert the data into our news table using the PDO interface.
Create the create.php file and add:
<?php
// Database connection variables
$db_host = 'localhost';
$db_name = 'phpnewsfeed';
$db_user = 'root';
$db_pass = '';
$db_charset = 'utf8';
// Connect to database using the PDO interface
try {
    $pdo = new PDO('mysql:host=' . $db_host . ';dbname=' . $db_name . ';charset=' . $db_charset, $db_user, $db_pass);
    $pdo->setAttribute(PDO::ATTR_ERRMODE, PDO::ERRMODE_EXCEPTION);
} catch (PDOException $exception) {
    // If there is an error with the connection, stop the script and display the error.
    exit('Failed to connect to database!');
}
// Form submit
if (isset($_POST['title'], $_POST['description'], $_POST['link'], $_POST['date'])) {
    // Validation
    if (empty($_POST['title']) || empty($_POST['description']) || empty($_POST['link']) || empty($_POST['date'])) {
        $msg = '<p class="msg error">Please fill out all fields!</p>';
    } else {
        // Image path
        $img = '';
        // Upload image if exists
        if (isset($_FILES['img']) && !empty($_FILES['img']['tmp_name'])) {
            $img = 'images/' . $_FILES['img']['name'];
            move_uploaded_file($_FILES['img']['tmp_name'], $img);
        }
        // Insert news into database
        $stmt = $pdo->prepare('INSERT INTO news (title, description, url_link, img, published_date) VALUES (?, ?, ?, ?, ?)');
        $stmt->execute([ $_POST['title'], $_POST['description'], $_POST['link'], $img, $_POST['date'] ]);
        // Output response
        $msg = '<p class="msg success">News created successfully!</p>';
    }
}
?>
Like before, we've included the PDO connection code to connect to our database, as it will be required to insert a new record. After, we check whether the captured data exists, and if so, we can proceed to insert the data into the database.
The code will also upload an image if one is selected in the upload image element, which will come next.
Add after:
<!DOCTYPE html>
<html>
	<head>
		<meta charset="utf-8">
		<meta name="viewport" content="width=device-width,minimum-scale=1">
		<title>Create News</title>
		<link href="style.css" rel="stylesheet" type="text/css">
        <style>
        html, body {
            background-color: #f9fafc;
        }
        </style>
	</head>
	<body>
	    <div class="create-news">

            <h1>Create News</h1>

            <form action="" method="post"  enctype="multipart/form-data">

                <label for="title"><span class="required">*</span>Title</label>
                <input type="text" name="title" id="title" placeholder="Title" required>

                <label for="description"><span class="required">*</span>Description</label>
                <textarea name="description" id="description" placeholder="Description" required></textarea>

                <label for="link"><span class="required">*</span>Link</label>
                <input type="url" name="link" id="link" placeholder="https://example.com/article/lorum-ipsum" required>

                <label for="img">Featured Image</label>
                <input type="file" name="img" id="img" accept="image/*">

                <label for="date"><span class="required">*</span>Publish Date</label>
                <input type="datetime-local" name="date" id="date" value="<?=date('Y-m-d H:i')?>" required>

                <?php if (isset($msg)): ?>
                <?=$msg?>
                <?php endif; ?>

                <button type="submit">Create</button>

            </form>

        </div>
	</body>
</html>
As we can see, the form elements represent our database structure. The form will execute a POST request upon submission. The $_POST['name'] variable will reflect the name attribute assigned to the form elements.
If we encounter any validation errors when submitting the form, they'll appear where the $msg variable is defined. Also, to prevent too many validation requests to the server, the required attribute has been added to various form elements.
Coding Tip The isset() function, combined with an IF statement, will prevent errors from occurring if a particular variable isn't declared.
If we navigate to the create.php file, we'll see the following:
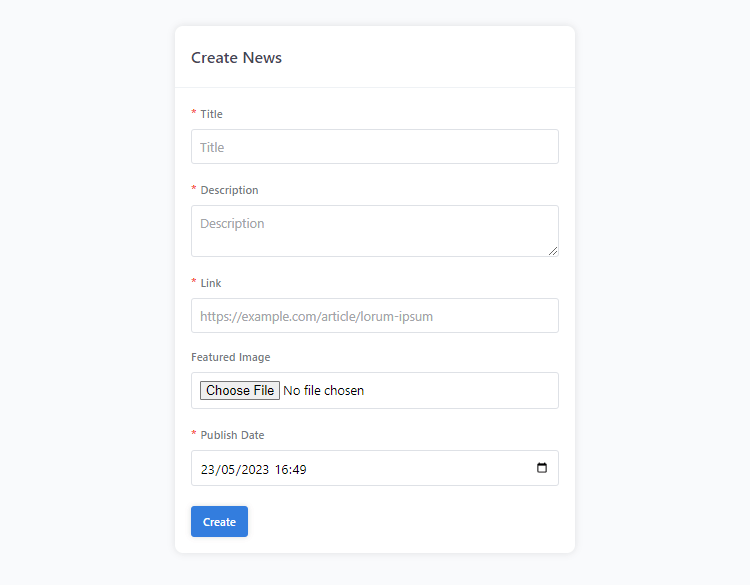
If we input data into the form and click the create button, the data should get inserted into the news table. If somehow it doesn't, I'd ensure the SQL queries reflect your database details (columns, table name, etc.).
Conclusion
We've basically covered all aspects of developing RSS applications with PHP and MySQL, from generating RSS files to populating them. Why reinvent the wheel when you can use existing technology to subscribe to your favorite websites? With PHP, we can leverage conventional methods to utilize RSS.
If you've enjoyed reading this article, please share it on social media, as it will encourage us to create more quality content.
Enjoy coding, and thanks for reading!
Skip the copy-pasting and get the complete, working project from this tutorial as a free ZIP with a setup guide included. Free for personal and commercial use.