 Download the full source codeComplete working project · Setup guide included · Free for commercial use
Free ZIP
Download the full source codeComplete working project · Setup guide included · Free for commercial use
Free ZIP
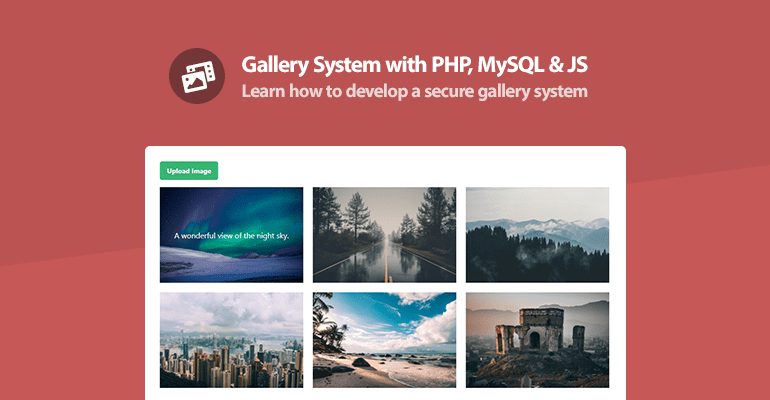
Want to learn how to build your own PHP gallery system from scratch? This beginner-friendly gallery tutorial will guide you step-by-step! We'll use PHP and MySQL to store and show your images, and a bit of JavaScript to create a cool pop-up for viewing pictures up close. By the end, you'll have a working photo gallery that you built yourself!
What's a Photo Gallery System?
Think of a gallery system as your own online photo album. It's a web page where you can display a collection of images, neatly organized. In our PHP gallery, users will be able to see all the pictures and even upload their own, making it a great way to share memories or showcase artwork online.
The Advanced package includes additional features and a download link to the source code. In addition, it contains the complete tutorial source code and basic version.
Contents
This PHP gallery tutorial is broken down into easy-to-follow sections. We'll start with the basics, set up our project, and then build each feature of the gallery system one by one. By the end, you'll see how PHP, MySQL, and JavaScript work together to create a dynamic website!
1. Getting Started
There are a few steps we need to take before we create our gallery system with PHP. We need to set up our web server environment (if you haven't already) and ensure we have the required extensions enabled.
1.1. Requirements
- Web Server — If you haven't installed a local web server solution package, I recommend you download and install XAMPP. XAMPP is an open-source web server solution package.
- PHP PDO Extension — As we are going to use the PHP PDO extension, make sure that it is enabled. It usually is by default, but in some circumstances, it may not be.
1.2. What You Will Learn in this Tutorial
- Simple Page Templates with PHP: Learn to make reusable headers and footers so you don't repeat code.
- Image Uploads: Build a form to upload pictures to your PHP gallery.
- Working with Databases: See how to save image details in a MySQL database and fetch them.
- Deleting Images Safely: Code a way to remove images from your gallery and the database.
- Cool Image Pop-ups: Use JavaScript to make images pop up bigger when clicked.
- Styling Your Gallery: Get hands-on with HTML and CSS to make your photo gallery look good.
1.3. File Structure & Setup
Alright, let's get our hands dirty! We'll fire up our web server and create the basic folders and files needed for our PHP image gallery project. This is like setting up the foundation before building a house.
- Open the XAMPP Control Panel
- Next to the Apache module, click Start
- Next to the MySQL module, click Start
- Navigate to XAMPPs installation folder (C:\xampp)
- Open the htdocs directory
- Create the following directories and files:
File Structure
\-- phpgallery
|-- functions.php
|-- index.php
|-- upload.php
|-- delete.php
|-- style.css
\-- images
|-- abandoned-building.jpg
|-- beach.jpg
|-- city.jpg
|-- mountain.jpg
|-- road.jpg
|-- stars.jpg
The above files and directories will contain the following:
- functions.php: This is our helper file. It'll have PHP code for common tasks like connecting to the database and creating page parts (header, footer).
- index.php: This is the main page of our PHP gallery system - it shows all the images.
- upload.php: This page will have the form for adding new pictures to our gallery.
- delete.php: We'll use this to remove images we no longer want.
- style.css: This file makes our gallery look pretty with CSS styles!
- images (folder): This folder is where all the actual image files you upload will be stored.
2. Creating the Database and setting-up Tables
Now, let's set up the place where our image information will live: a MySQL database. You can use a tool like phpMyAdmin (which often comes with XAMPP) to do this. It's like creating a digital filing cabinet for our photo gallery.
If you're using phpMyAdmin, follow these instructions:
- Navigate to localhost/phpmyadmin in your browser
- Select the Databases tab at the top
- Under Create database, type in phpgallery in the text box
- Select utf8mb4_unicode_ci as the collation (UTF-8 is the default encoding in HTML5)
- Select Create
That will create the MySQL database we're going to use. Now, we need to create the table and insert the example images that are located in the images directory. We can simply execute the below query to insert all the details for our images into the database as opposed to creating all the tables and records individually. Be sure to select the phpgallery database first and click the SQL tab located at the top.
Creating a database might sound tricky, but with tools like phpMyAdmin, it's just a few clicks. This database is crucial for our PHP gallery system as it will keep track of all our images and their details.
CREATE TABLE IF NOT EXISTS `images` (
`id` int(11) NOT NULL AUTO_INCREMENT,
`title` varchar(255) NOT NULL,
`description_text` mediumtext NOT NULL,
`filepath` varchar(255) NOT NULL,
`uploaded_date` datetime NOT NULL DEFAULT current_timestamp(),
PRIMARY KEY (`id`)
) ENGINE=InnoDB AUTO_INCREMENT=7 DEFAULT CHARSET=utf8mb4 COLLATE=utf8mb4_unicode_ci;
INSERT INTO `images` (`id`, `title`, `description_text`, `filepath`, `uploaded_date`) VALUES
(1, 'Abandoned Building', '', 'images/abandoned-building.jpg', '2025-01-01 00:00:00'),
(2, 'Beach', 'Hot summer day at the beach.', 'images/beach.jpg', '2025-01-01 00:00:00'),
(3, 'City', 'A view down at the city.', 'images/city.jpg', '2025-01-01 00:00:00'),
(4, 'Mountain', '', 'images/mountain.jpg', '2025-01-01 00:00:00'),
(5, 'Road', 'Going down the only road I\'ve even known.', 'images/road.jpg', '2025-01-01 00:00:00'),
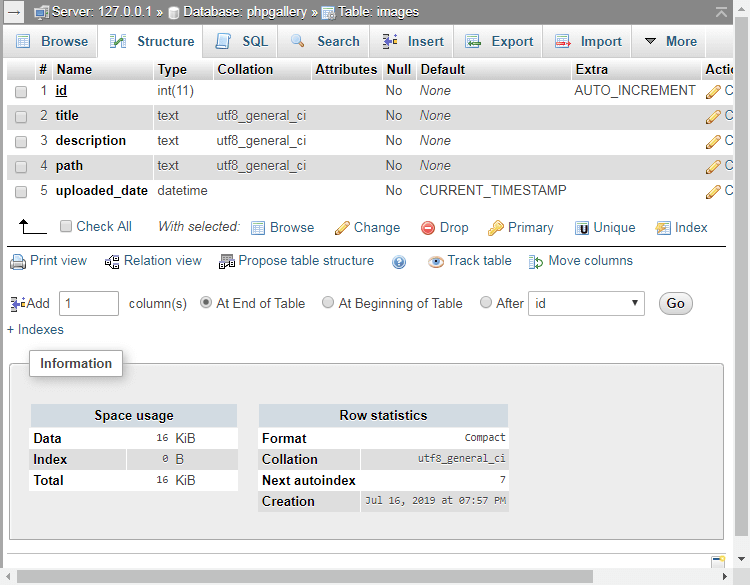
(6, 'Stars', 'A wonderful view of the night sky.', 'images/stars.jpg', '2025-01-01 00:00:00');The above statement will create the images table with the following columns:
- id — The unique identifier of the record. We can use this column to identify which column is which.
- title — The title of the image. It will appear in the image popup modal.
- description_text — The description of the image. It will appear when hovering over images and in the image popup modal.
- filepath — The file path of the image.
- uploaded_date — The date the image was uploaded.
This SQL code does two things: first, it builds an "images" table in our php gallery database with columns to store an ID, title, description, filepath, and upload date for each picture. Think of these as labels for our image information. Second, it adds some sample images so you have something to see when we first run our PHP gallery. Don't forget to download the sample image files (mentioned in the File Structure part) and put them in your "images" folder.
The images table structure should appear as the following on phpMyAdmin:
That's all we need to do for our MySQL database. Feel free to close phpMyAdmin as we no longer need to use it.
3. Designing the Gallery System with CSS
Our PHP gallery system works, but let's make it look good! CSS (Cascading Style Sheets) is how we add colors, layout, and style to web pages. Open your style.css file and paste in the following code. This will provide a clean and simple design for your image gallery.
* {
  box-sizing: border-box;
  font-family: system-ui, "Segoe UI", Roboto, Helvetica, Arial, sans-serif, "Apple Color Emoji", "Segoe UI Emoji", "Segoe UI Symbol";
  font-size: 16px;
}
body {
  background-color: #FFFFFF;
  margin: 0;
}
.navtop {
  background-color: #362f2f;
  height: 60px;
  width: 100%;
  border: 0;
}
.navtop div {
  display: flex;
  margin: 0 auto;
  width: 1000px;
  height: 100%;
}
.navtop div h1, .navtop div a {
  display: inline-flex;
  align-items: center;
}
.navtop div h1 {
  flex: 1;
  font-size: 18px;
  padding: 0;
  margin: 0;
  color: #fff;
  font-weight: 400;
}
.navtop div a {
  padding: 0 20px;
  text-decoration: none;
  color: #b6acac;
  font-weight: 500;
}
.navtop div a i {
  padding: 2px 8px 0 0;
}
.navtop div a:hover {
  color: #fff;
}
.content {
  width: 1000px;
  margin: 0 auto;
}
.content h2 {
  margin: 0;
  padding: 35px 0 15px 0;
  font-size: 26px;
  color: #575353;
  font-weight: 600;
}
.content p {
  margin: 0;
  padding: 15px 0;
  font-size: 16px;
  color: #575353;
  font-weight: 400;
}
.image-popup {
  display: none;
  flex-flow: column;
  justify-content: center;
  align-items: center;
  position: fixed;
  top: 0;
  left: 0;
  width: 100%;
  height: 100%;
  background-color: rgba(0, 0, 0, 0.8);
  z-index: 99999;
}
.image-popup .con {
  display: flex;
  flex-flow: column;
  background-color: #ffffff;
  padding: 25px 25px 0 25px;
  border-radius: 5px;
}
.image-popup .con h3 {
  margin: 0;
  font-size: 20px;
  color: #575353;
  font-weight: 600;
}
.image-popup .con p {
  margin: 0;
  padding: 15px 0 20px 0;
  font-size: 16px;
  color: #575353;
  font-weight: 400;
}
.image-popup .con .trash {
  display: inline-flex;
  align-items: center;
  align-self: flex-end;
  justify-content: center;
  text-decoration: none;
  appearance: none;
  cursor: pointer;
  border: 0;
  background: #be5151;
  color: #FFFFFF;
  padding: 0 12px;
  font-size: 14px;
  font-weight: 600;
  border-radius: 4px;
  width: auto;
  height: 35px;
  box-shadow: 0px 0px 6px 1px rgba(68, 45, 45, 0.1);
  margin: 15px 0 35px 0;
}
.image-popup .con .trash svg {
  fill: #fff;
}
.image-popup .con .trash:hover {
  background-color: #b34343;
}
.home .upload-image {
  display: inline-flex;
  align-items: center;
  justify-content: center;
  text-decoration: none;
  appearance: none;
  cursor: pointer;
  border: 0;
  background: #be5151;
  color: #FFFFFF;
  padding: 0 18px;
  font-size: 14px;
  font-weight: 600;
  border-radius: 4px;
  height: 38px;
  box-shadow: 0px 0px 6px 1px rgba(68, 45, 45, 0.1);
  margin: 15px 0 35px 0;
}
.home .upload-image:has(svg) {
  padding: 0 18px 0 14px;
}
.home .upload-image svg {
  margin-right: 7px;
  fill: #e5b9b9;
}
.home .upload-image:hover {
  background-color: #b34343;
}
.home .images {
  display: flex;
  flex-flow: wrap;
  gap: 20px;
}
.home .images a {
  display: block;
  text-decoration: none;
  position: relative;
  overflow: hidden;
  width: 320px;
  height: 200px;
}
.home .images a:hover span {
  opacity: 1;
  transition: opacity 1s;
}
.home .images span {
  display: flex;
  justify-content: center;
  align-items: center;
  text-align: center;
  position: absolute;
  opacity: 0;
  top: 0;
  left: 0;
  color: #fff;
  width: 100%;
  height: 100%;
  background-color: rgba(0, 0, 0, 0.2);
  padding: 15px;
  transition: opacity 1s;
}
.upload form {
  padding: 15px 0;
  display: flex;
  flex-flow: column;
  width: 400px;
}
.upload form label {
  display: inline-flex;
  width: 100%;
  padding: 10px 0;
  margin-right: 25px;
  font-size: 16px;
  color: #575353;
}
.upload form input, .upload form textarea {
  padding: 10px;
  width: 100%;
  margin-right: 25px;
  margin-bottom: 15px;
  border: 1px solid #e6e2e2;
  border-radius: 4px;
}
.upload form textarea {
  height: 200px;
}
.upload form button {
  display: inline-flex;
  align-items: center;
  justify-content: center;
  text-decoration: none;
  appearance: none;
  cursor: pointer;
  border: 0;
  background: #be5151;
  color: #FFFFFF;
  padding: 0 18px;
  font-size: 14px;
  font-weight: 600;
  border-radius: 4px;
  width: 130px;
  height: 38px;
  box-shadow: 0px 0px 6px 1px rgba(68, 45, 45, 0.1);
  margin: 15px 0 35px 0;
}
.upload form button:hover {
  background-color: #b34343;
}
.delete .yesno {
  display: flex;
  gap: 15px;
}
.delete .yesno a {
  display: inline-flex;
  align-items: center;
  justify-content: center;
  text-decoration: none;
  appearance: none;
  cursor: pointer;
  border: 0;
  background: #be5151;
  color: #FFFFFF;
  padding: 0 18px;
  font-size: 14px;
  font-weight: 600;
  border-radius: 4px;
  width: 60px;
  height: 38px;
  box-shadow: 0px 0px 6px 1px rgba(68, 45, 45, 0.1);
  margin: 15px 0 35px 0;
}
.delete .yesno a:hover {
  background-color: #b34343;
}
The above code is the stylesheet we'll use for the gallery system. Simple and clean design. Not as fancy as it could be, but it's a great starting point. You are free to customize it to your liking, just don't forget to clear the cache in your browser when making changes to it.
4. Creating the Functions File
Next up is functions.php. This file is super useful because we'll put reusable pieces of PHP code here, called functions. For example, we'll have a function to connect to our MySQL database and functions to create the header and footer for our gallery system pages. This way, we don't have to write the same code over and over!
Edit the functions.php file and add:
<?php
// Function to connect to MySQL database using PDO interface
function pdo_connect_mysql() {
    // Update the details below to your database connection details
    $DATABASE_HOST = 'localhost';
    $DATABASE_USER = 'root';
    $DATABASE_PASS = '';
    $DATABASE_NAME = 'phpgallery';
	$DATABASE_CHARSET = 'utf8mb4';
    try {
    	return new PDO('mysql:host=' . $DATABASE_HOST . ';dbname=' . $DATABASE_NAME . ';charset=' . $DATABASE_CHARSET, $DATABASE_USER, $DATABASE_PASS);
    } catch (PDOException $exception) {
    	// If there is an error with the connection, stop the script and display the error.
    	exit('Failed to connect to database!');
    }
}
The above function will be used to connect to our MySQL database using the PDO interface. If somehow you fail to connect using the above details, you will have to update the database variables and make sure they reflect your MySQL credentials.
Add after:
// Template header, feel free to customize this
function template_header($title) {
echo <<<EOT
<!DOCTYPE html>
<html>
	<head>
		<meta charset="utf-8">
		<title>$title</title>
		<link href="style.css" rel="stylesheet" type="text/css">
	</head>
	<body>
    <nav class="navtop">
    	<div>
    		<h1>Gallery System</h1>
            <a href="index.php">Home</a>
    	</div>
    </nav>
EOT;
}
The above code is the header function we'll use for all the pages we create. All we have to do is execute the function name as opposed to writing the same code in every file that we create. Feel free to customize the header.
Add after:
// Template footer
function template_footer() {
echo <<<EOT
    </body>
</html>
EOT;
}
?>
The above footer template will close all the opening tags that we defined in the header function. We wouldn't want an invalid document containing unclosed tags; definitely not ideal for SEO.
With our functions.php file ready, we have a solid toolkit for building the pages of our PHP gallery system. These functions will save us a lot of time and keep our code organized. Next, let's build the main page of our image gallery.
5. Creating the Home Page
The index.php file is the heart of our PHP photo gallery - it's the main page everyone will see. Here, we'll write PHP code to grab all the image details from our MySQL database and then display each image nicely on the page. This is where your gallery system comes to life!
Edit the index.php file and add:
<?php
include 'functions.php';
// Connect to MySQL database
$pdo = pdo_connect_mysql();
// MySQL query that selects all the images ordered by the date they were uploaded
$stmt = $pdo->query('SELECT * FROM images ORDER BY uploaded_date DESC');
$images = $stmt->fetchAll(PDO::FETCH_ASSOC);
?>
First, we include the functions.php file, which contains the functions that we're going to use. After, we connect to our MySQL database by executing the pdo_connect_mysql() function and subsequently retrieve all the details for the images that we have uploaded from our database table images, ordered by the uploaded date column (descending).
Add after:
<?=template_header('Gallery')?>

<div class="content home">

	<h2>Gallery</h2>

	<p>Welcome to the gallery page, you can view the list of images below.</p>

	<a href="upload.php" class="upload-image"><svg width="18" height="18" xmlns="http://www.w3.org/2000/svg" viewBox="0 0 24 24"><path d="M19,13H13V19H11V13H5V11H11V5H13V11H19V13Z" /></svg>Upload Image</a>

	<div class="images">
		<?php foreach ($images as $image): ?>
		<?php if (file_exists($image['filepath'])): ?>
		<a href="#">
			<img src="<?=$image['filepath']?>" alt="<?=htmlspecialchars($image['description_text'], ENT_QUOTES)?>" data-id="<?=$image['id']?>" data-title="<?=htmlspecialchars($image['title'], ENT_QUOTES)?>" width="320" height="200">
			<span><?=htmlspecialchars($image['description_text'], ENT_QUOTES)?></span>
		</a>
		<?php endif; ?>
		<?php endforeach; ?>
	</div>

</div>

<div class="image-popup"></div>
As you can see above, all that we have to do to include the header template is to execute the function name (along with the title), which we have done above.
In addition, we populate all the images retrieved from the MySQL database in HTML format. With the foreach function, we can iterate the associative array and handle each record accordingly. The file_exists function is self-explanatory; it will check whether the image exists or not.
The data-* attributes will be used to store information related to the image, which we can subsequently retrieve with JavaScript. They will determine what to output in the pop-up window.
Add after:
<script>
// Container we'll use to show an image
const imagePopup = document.querySelector('.image-popup');
// Loop each image so we can add the on click event
document.querySelectorAll('.images a').forEach(imgLink => {
	imgLink.onclick = event => {
		event.preventDefault();
		const imgMeta = imgLink.querySelector('img');
		const img = new Image();
		img.onload = () => {
			// Create the pop out image
			imagePopup.innerHTML = `
				<div class="con">
					<h3>${imgMeta.dataset.title}</h3>
					<p>${imgMeta.alt}</p>
					<img src="${img.src}" width="${img.width}" height="${img.height}">
					<a href="delete.php?id=${imgMeta.dataset.id}" class="trash" title="Delete Image"><svg width="16" height="16" xmlns="http://www.w3.org/2000/svg" viewBox="0 0 24 24"><path d="M9,3V4H4V6H5V19A2,2 0 0,0 7,21H17A2,2 0 0,0 19,19V6H20V4H15V3H9M7,6H17V19H7V6M9,8V17H11V8H9M13,8V17H15V8H13Z" /></svg></a>
				</div>
			`;
			imagePopup.style.display = 'flex';
		};
		img.src = imgMeta.src;
	};
});
// Hide the image popup container if user clicks outside the image
imagePopup.onclick = event => {
	if (event.target.className == 'image-popup') {
		imagePopup.style.display = "none";
	}
};
</script>
The above JavaScript code will create the pop-up window for the corresponding image. If you prefer to put your JavaScript code in a separate JS file, you can do that too.
Add after:
<?=template_footer()?>And now we can end the template for the home page by executing the template footer function.
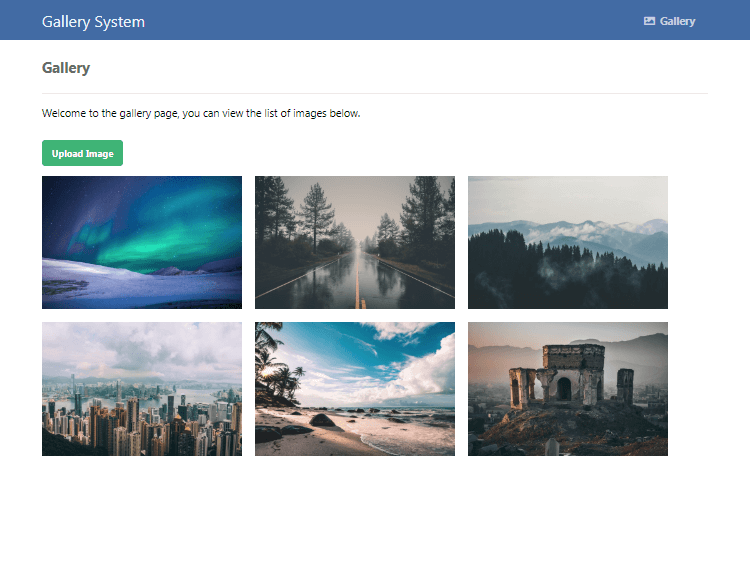
That's all we need to do for the home page. If we navigate to localhost/phpgallery/index.php, we'll see the following:
And if we click one of the images, we'll see the following:
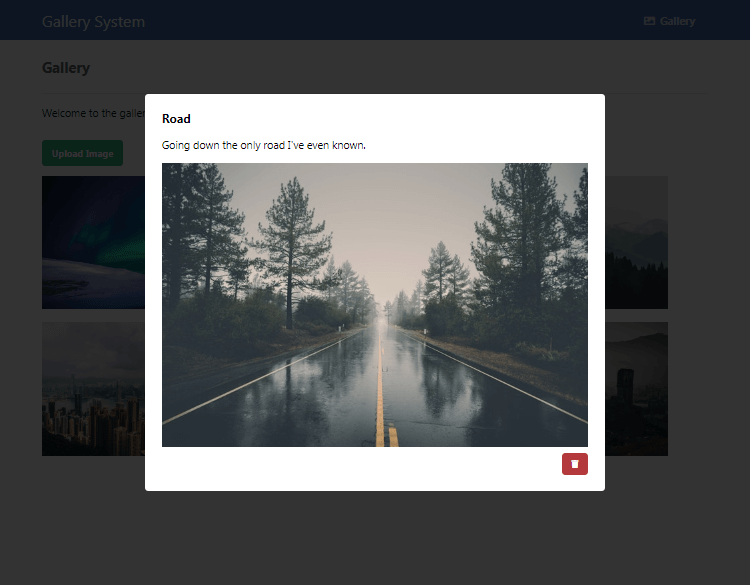
The pop-up image effect is created with JavaScript, and therefore we don't need to reload the page every time we click a different one. We can close the pop-up window by clicking outside of the image container.
6. Creating the Upload Page
The upload page is the page we'll use to upload new images and store information related to those images in our MySQL database images table.
Edit the upload.php file and add:
<?php
include 'functions.php';
// The output message
$msg = '';
// Check if user uploaded a new image
if (isset($_FILES['image'], $_POST['title'], $_POST['description'])) {
	// The folder where the images will be stored
	$target_dir = 'images/';
	// The path of the new uploaded image
	$image_path = $target_dir . basename($_FILES['image']['name']);
	// Check to make sure the image is valid
	if (!empty($_FILES['image']['tmp_name']) && getimagesize($_FILES['image']['tmp_name'])) {
		// Validation checks
		if (file_exists($image_path)) {
			$msg = 'Image already exists! Please choose another or rename that image.';
		} else if ($_FILES['image']['size'] > 500000) {
			$msg = 'Image file size too large! Please choose an image less than 500kb.';
		} else {
			// Everything checks out, so now we can move the uploaded image
			move_uploaded_file($_FILES['image']['tmp_name'], $image_path);
			// Connect to MySQL database
			$pdo = pdo_connect_mysql();
			// Insert image info into the database (title, description, image path, and date added)
			$stmt = $pdo->prepare('INSERT INTO images (title, description_text, filepath, uploaded_date) VALUES (?, ?, ?, ?)');
	        $stmt->execute([ $_POST['title'], $_POST['description'], $image_path, date('Y-m-d H:i:s') ]);
			// Output success message
			$msg = 'Image uploaded successfully!';
		}
	} else {
		// No image uploaded or invalid image
		$msg = 'Please upload an image!';
	}
}
?>
The above code will upload a new image to the images directory and store details associated with it in the MySQL database, but before the image is uploaded, we first check if the image file already exists and make sure it's actually an image. We use the getimagesize() function to validate the image.
In addition, if the uploaded image already exists, the code will output an error message to the user. The maximum image size is set to 500kb, which you can change if you want to upload images with larger file sizes.
Finally, if no error messages have occurred, the image details will be inserted into our MySQL images table.
Add after:
<?=template_header('Upload Image')?>

<div class="content upload">

	<h2>Upload Image</h2>

	<form action="upload.php" method="post" enctype="multipart/form-data">

		<label for="image">Choose Image</label>
		<input type="file" name="image" accept="image/*" id="image" required>

		<label for="title">Title</label>
		<input type="text" name="title" id="title" placeholder="Title" required>

		<label for="description">Description</label>
		<textarea name="description" id="description" placeholder="Description"></textarea>

	    <button type="submit" name="submit">Upload Image</button>

	</form>

	<p><?=$msg?></p>

</div>

<?=template_footer()?>
The above code is the upload template, which consists of an HTML form that we'll use to enter details related to the corresponding image.
Moreover, when the user clicks the submit button, the form is processed using the PHP code that we added previously. The request method is set to POST, which is used to send data to a server. Unlike a GET request, the POST method will not append the parameters to the URL.
If we navigate to the upload page, we'll see the following:
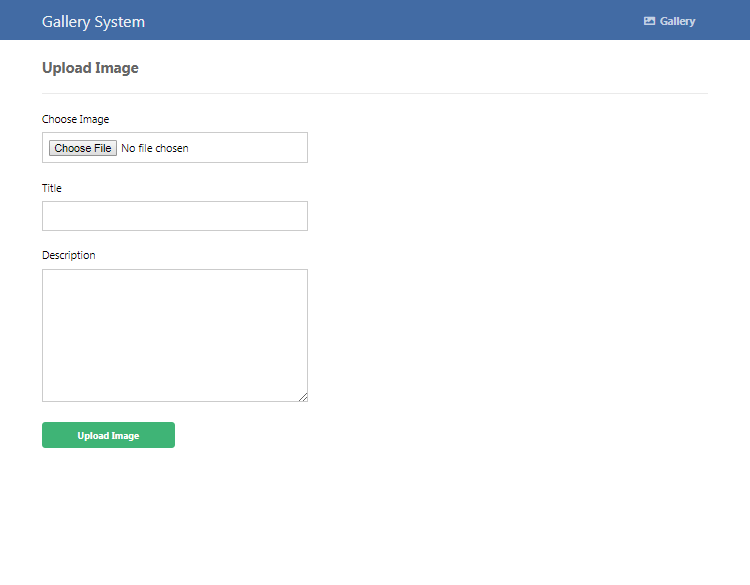
To test that it is working correctly, select an image and fill out the form — remember the image needs to be less than 500kb, and click the Upload Image button after you've finished. You should see the response located below the form.
7. Creating the Delete Page
The delete page will be used to delete images that we have uploaded. The specified image will be deleted from the images directory, and information associated with the image will be deleted from the MySQL images table.
Edit the delete.php file and add:
<?php
include 'functions.php';
// Connect to MySQL database
$pdo = pdo_connect_mysql();
// The output message
$msg = '';
// Check that the image ID exists
if (isset($_GET['id'])) {
    // Select the record that is going to be deleted
    $stmt = $pdo->prepare('SELECT * FROM images WHERE id = ?');
    $stmt->execute([ $_GET['id'] ]);
    $image = $stmt->fetch(PDO::FETCH_ASSOC);
    // If no image exists...
    if (!$image) {
        exit('Image doesn\'t exist with that ID!');
    }
    // Make sure the user confirms before deletion
    if (isset($_GET['confirm'])) {
        if ($_GET['confirm'] == 'yes') {
            // User clicked the "Yes" button, delete file and delete record
            unlink($image['filepath']);
            $stmt = $pdo->prepare('DELETE FROM images WHERE id = ?');
            $stmt->execute([ $_GET['id'] ]);
            // Output msg
            $msg = 'You have deleted the image!';
        } else {
            // User clicked the "No" button, redirect them back to the home/index page
            header('Location: index.php');
            exit;
        }
    }
} else {
    // No GET param provided
    exit('No ID specified!');
}
?>
Before the corresponding image is deleted, the code requires the ID of the image, which is retrieved from a GET parameter, as it will determine which image we're going to delete. The ID parameter is associated with the ID in the MySQL database.
We also check whether the image is in the database and check whether the user has clicked the Yes confirmation button. If the user clicks the Yes button, the code will delete the file from the server using the unlink() function and subsequently execute a MySQL DELETE FROM statement that will delete the image record from the database.
Add after:
<?=template_header('Delete')?>

<div class="content delete">

	<h2>Delete Image #<?=$image['id']?></h2>

    <?php if ($msg): ?>

    <p><?=$msg?></p>

    <?php else: ?>

	<p>Are you sure you want to delete <?=htmlspecialchars($image['title'], ENT_QUOTES)?>?</p>

    <div class="yesno">
        <a href="delete.php?id=<?=$image['id']?>&confirm=yes">Yes</a>
        <a href="delete.php?id=<?=$image['id']?>&confirm=no">No</a>
    </div>
    <?php endif; ?>

</div>

<?=template_footer()?>
The above code is the template for our delete page, which will confirm to the user with a Yes and No button if they want to delete the image.
If we navigate to the home page and click on one of the images, we will see the delete icon, and if we click on that, we'll see something similar to the following:
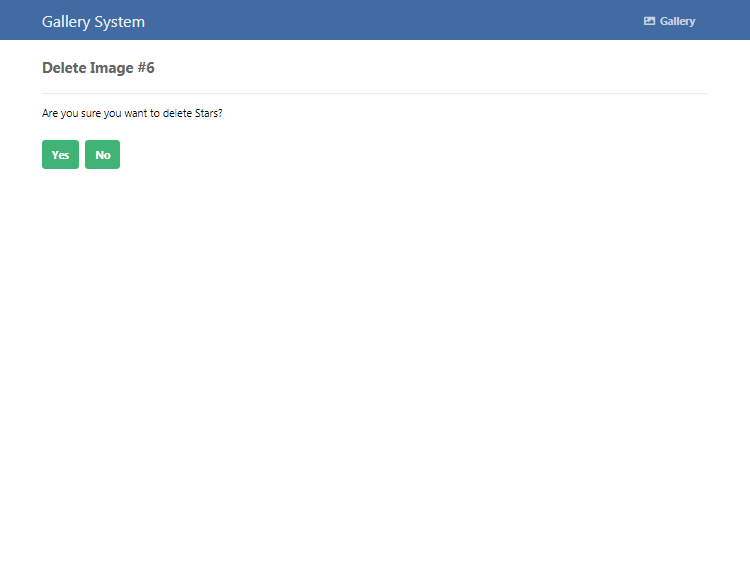
If we click the Yes button, the image will be deleted from our images directory and from our MySQL database.
Conclusion
Amazing work! You've just built your very own PHP gallery system using PHP, MySQL, and a touch of JavaScript. You've learned how to display images, upload new ones, and even delete them - core skills for any web developer!
What's next on your coding adventure? You could try adding features like image categories, user comments, or even pagination for large galleries. This gallery tutorial is a great starting point.
If you found this PHP gallery tutorial helpful, please share it with others who might be learning. We love hearing from you, so feel free to drop a comment below. Happy coding, and thanks for following along!
Skip the copy-pasting and get the complete, working project from this tutorial as a free ZIP with a setup guide included. Free for personal and commercial use.
If you would like to support us, consider the advanced gallery system below. It will greatly help us create more tutorials and keep our website up and running. The advanced package includes improved code and more features.
— View Dashboard
— Create, edit, and delete media
— Search, sort, and approve media
— Manage Collections
— Manage Accounts
— Edit Settings
* Advanced package also includes the tutorial source and basic package.
* Instant download after payment.
To learn more about the advanced package, please visit the Advanced Gallery System page.