 Download the full source codeComplete working project · Setup guide included · Free for commercial use
Free ZIP
Download the full source codeComplete working project · Setup guide included · Free for commercial use
Free ZIP
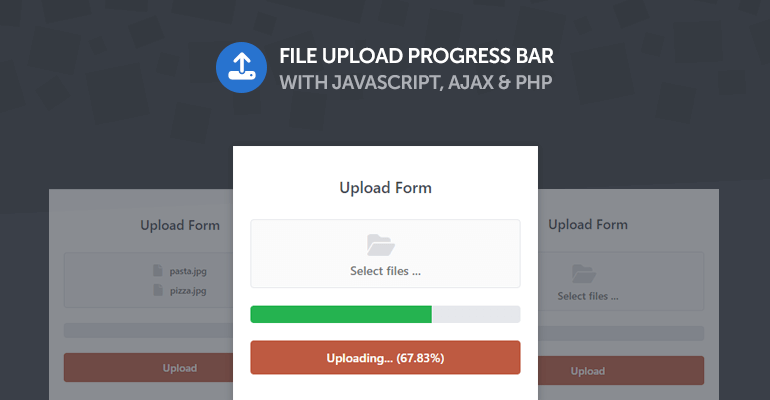
In this tutorial, we'll be creating a multiple file upload interface with a progress bar using JavaScript (AJAX) and PHP. Implementing an elegant interface for a seamless experience for the end user and utilizing modern elements for innovation.
A file upload interface is widely used, but most developers find it difficult to implement a progress bar and therefore I have decided to write this article to help guide you throughout the entire process, which includes creating the user interface, using JS to process the form and update the progress bar, and leveraging PHP to move uploaded files to a particular directory.
Contents
1. Introduction
While the file upload with a progress bar interface may seem difficult to create, it's actually not and doesn't require as many lines of code as you may think. We'll implement the most elegant and clean methods while maintaining all the fundamental features for an upload interface.
1.1. Why should I implement a progress bar?
Imagine the following scenario, you select your file using the input file element and subsequently submit the form, but you have no indication of the upload progress, so you'll assume the page is unresponsive and will most likely close it before the file successfully uploads.
Therefore, implementing a progress bar is convenient and will prevent the end user from closing the page.
2. Getting Started
In this section, we'll thoroughly go through every phase to ensure we meet the requirements and have structured our project correctly.
2.1. Requirements
Before we jump on the development bandwagon, we need to ensure we meet all requirements, otherwise there will be consequences.
The following are required for our project:
- Web Server Solution Stack Package — We recommend you download and install XAMPP.
- PHP >= 5.5 — The latest version is included with XAMPP, and therefore you don't need to download it separately.
- Code Editor — We recommend Visual Studio Code.
WarningXAMPP server should not be used for production purposes but only for development purposes.
2.2. What You Will Learn in this Tutorial
Below, I have outlined what you'll accomplish in this tutorial.
- File Upload — Upload multiple files with JS and PHP.
- Event Handlers — Utilize JS event handlers to update the progress bar and label.
- AJAX Requests — Initiate AJAX requests that will upload the form data in the background.
- Form Validation — Implement validation to prevent invalid submissions.
- Interface Design — Design a user interface with CSS3 and HTML.
2.3. File Structure & Setup
Let's start by creating the files we're going to use for our project. Navigate to the webroot directory (C:\xampp\htdocs), and create the following directories and files:
File Structure
\-- phpupload
|-- style.css
|-- index.html
|-- upload.php
Each file will consist of the following:
- style.css — The stylesheet will structure our layout and make it look elegant.
- index.html — The index file will contain the file upload interface and AJAX code to process the form.
- upload.php — This file will handle the uploaded files and designate them to a particular directory. We'll leverage the for loop to iterate multiple files.
After, we can go ahead and start XAMPP — follow the below instructions.
- Open the XAMPP Control Panel
- Next to the Apache module, click Start
- Next to the MySQL module, click Start
- If successful, the background color will change to green. If not, you might want to check your port numbers to ensure they don't conflict with the module ports.
- Navigate to http://localhost/ in your browser — the XAMPP welcome page should appear.
3. Stylesheet (CSS3)
The stylesheet will structure our file upload interface and make it look more appealing.
Edit the style.css file and add:
* {
  box-sizing: border-box;
  font-family: -apple-system, BlinkMacSystemFont, "segoe ui", roboto, oxygen, ubuntu, cantarell, "fira sans", "droid sans", "helvetica neue", Arial, sans-serif;
  font-size: 16px;
}
body {
  margin: 0;
  padding: 15px;
  background-color: #63a7df;
}
.upload-form {
  display: flex;
  max-width: 350px;
  padding: 20px;
  flex-flow: column;
  margin: 100px auto 15px auto;
  background-color: #fff;
  box-shadow: 0 0 5px 0 rgba(0, 0, 0, 0.15);
}
.upload-form h1 {
  margin: 0;
  padding: 15px;
  font-size: 18px;
  font-weight: 500;
  color: #434850;
  text-align: center;
}
.upload-form label {
  display: flex;
  flex-flow: column;
  justify-content: center;
  align-items: center;
  background-color: #fafbfb;
  border: 1px solid #e6e8ec;
  color: #737476;
  padding: 10px 12px;
  font-weight: 500;
  font-size: 14px;
  margin: 10px 0;
  border-radius: 4px;
  cursor: pointer;
}
.upload-form label i {
  margin-right: 10px;
  padding: 5px 0;
  color: #dbdce0;
}
.upload-form label span {
  display: flex;
  align-items: center;
  justify-content: center;
  font-size: 12px;
  word-break: break-all;
}
.upload-form label:hover {
  background-color: #f7f8f9;
  border: 1px solid #e3e5ea;
  color: #68686a;
}
.upload-form label:hover i {
  color: #cfd1d4;
}
.upload-form input[type="file"] {
  appearance: none;
  visibility: hidden;
  height: 0;
  width: 0;
  padding: 0;
  margin: 0;
}
.upload-form .progress {
  height: 20px;
  border-radius: 4px;
  margin: 10px 0;
  background-color: #e6e8ec;
}
.upload-form button {
  appearance: none;
  background-color: #be5a41;
  border-radius: 4px;
  font-weight: 500;
  font-size: 14px;
  border: 0;
  padding: 10px 12px;
  margin-top: 10px;
  color: #fff;
  cursor: pointer;
}
.upload-form button:hover {
  background-color: #b6563e;
}
.upload-form button:disabled {
  background-color: #aca7a5;
}
.upload-form .result {
  padding-top: 15px;
}
In the above CSS file, we're going to hide the default file input element and replace it with a customized one. It will enable us to have more flexibility over the control.
4. Creating the Form Interface with HTML
The form interface will enable us to select multiple files and submit them for processing. It will consist of a label element, input file element, progress bar, submit button, and a container to output the response.
Edit the index.html file and add:
<!DOCTYPE html>
<html>
	<head>
		<meta charset="utf-8">
        <meta name="viewport" content="width=device-width,minimum-scale=1">
		<title>Upload Form</title>
		<link href="style.css" rel="stylesheet" type="text/css">
        <link rel="stylesheet" href="https://cdnjs.cloudflare.com/ajax/libs/font-awesome/6.2.0/css/all.min.css" integrity="sha512-xh6O/CkQoPOWDdYTDqeRdPCVd1SpvCA9XXcUnZS2FmJNp1coAFzvtCN9BmamE+4aHK8yyUHUSCcJHgXloTyT2A==" crossorigin="anonymous" referrerpolicy="no-referrer">
	</head>
	<body>
        <form class="upload-form" action="upload.php" method="post" enctype="multipart/form-data">

            <h1>Upload Form</h1>

            <label for="files"><i class="fa-solid fa-folder-open fa-2x"></i>Select files ...</label>
            <input id="files" type="file" name="files[]" multiple>

            <div class="progress"></div>

            <button type="submit">Upload</button>

            <div class="result"></div>

        </form>
    </body>
</html>
First and foremost, we've included our stylesheet using the link element. In addition, we've included an external library called Font Awesome, which will enable us to add beautiful icons to our HTML template.
PHP Tip The only way to submit multiple files using one input file element is to append brackets to the end of the name attribute, so files
becomes files[]
, and so on.
Focusing on the form element, we've set the request method to POST, which is stored in the body when the form is submitted and will be subsequently processed on the server side. The label element will trigger the input file element when it's clicked.
In addition, we've set the action attribute to upload.php, which will associate our form with the upload file. In order to send files to the server, the enctype attribute must be set to multipart/form-data. It's essential as it will allow files to be sent through a POST request. Without declaring the method, the files will not be captured when processing the data with PHP.
If we navigate to our index file, we should see the following:
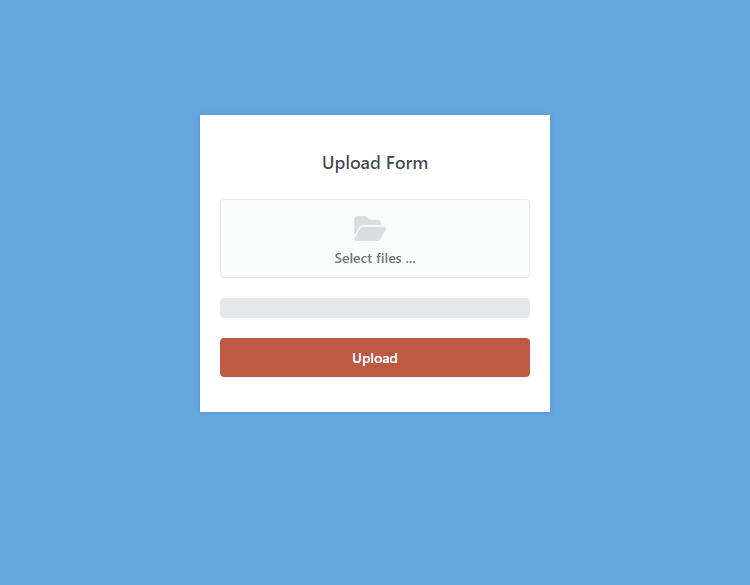
But wait! The upload interface isn't working! That's because we haven't implemented the AJAX and PHP code yet! In the next section, we'll implement the JS code to process the form and move a step closer to finishing our fully functional upload form.
5. Event Handling & AJAX Requests with JS
Event handlers will enable us to bind specific events to our form elements and seamlessly interact with them. The AJAX request will utilize the POST method to initiate requests to our PHP upload file, which will effectively process the uploaded files.
Edit the index.html file and append the following code to the body:
<script>
// Declare global variables for easy access
const uploadForm = document.querySelector('.upload-form');
const filesInput = uploadForm.querySelector('#files');
</script>
In the above code, we've declared two variables that will retrieve the form element and the input file element. The two variables will appear in multiple instances of our code, and therefore it's more convenient to declare them as opposed to writing the same code over and over again.
After the declared variables, add:
// Attach onchange event handler to the files input element
filesInput.onchange = () => {
    // Append all the file names to the label
    uploadForm.querySelector('label').innerHTML = '';
    for (let i = 0; i < filesInput.files.length; i++) {
        uploadForm.querySelector('label').innerHTML += '<span><i class="fa-solid fa-file"></i>' + filesInput.files[i].name + '</span>';
    }
};
We're binding the onchange event handler to our input files element, which will update the label to reflect the selected file names. Basically, it will help the end user identify which files they're going to upload.
Because I've added support for multiple files, I've included a for loop that will iterate all the selected files and append the file name to the label element.
Add after:
// Attach submit event handler to form
uploadForm.onsubmit = event => {
    event.preventDefault();
    // Make sure files are selected
    if (!filesInput.files.length) {
        uploadForm.querySelector('.result').innerHTML = 'Please select a file!';
    } else {
        // Create the form object
        let uploadFormDate = new FormData(uploadForm);
        // Initiate the AJAX request
        let request = new XMLHttpRequest();
        // Ensure the request method is POST
        request.open('POST', uploadForm.action);
        // Attach the progress event handler to the AJAX request
        request.upload.addEventListener('progress', event => {
            // Add the current progress to the button
            uploadForm.querySelector('button').innerHTML = 'Uploading... ' + '(' + ((event.loaded/event.total)*100).toFixed(2) + '%)';
            // Update the progress bar
            uploadForm.querySelector('.progress').style.background = 'linear-gradient(to right, #25b350, #25b350 ' + Math.round((event.loaded/event.total)*100) + '%, #e6e8ec ' + Math.round((event.loaded/event.total)*100) + '%)';
            // Disable the submit button
            uploadForm.querySelector('button').disabled = true;
        });
        // The following code will execute when the request is complete
        request.onreadystatechange = () => {
            if (request.readyState == 4 && request.status == 200) {
                // Output the response message
                uploadForm.querySelector('.result').innerHTML = request.responseText;
            }
        };
        // Execute request
        request.send(uploadFormDate);
    }
};
Initially, we bind the onsubmit event handler to our form, which will trigger when the end user submits the form (e.g. clicks the submit button). After, we've implemented basic validation to ensure there are files selected. If there aren't any files selected, output a simple error on the form, otherwise process the AJAX request.
To make it easy for us to bind the form data to the AJAX request, we incorporate the FormData interface, which will automatically construct our form data, and therefore there isn't anything else we need to do regarding our form.
The XMLHttpRequest API will process our form and send the data to our server in the background. The progress event handler attached to the request object will update various elements with the current progress, which is measured in percentage. In addition, we're leveraging the linear-gradient CSS property to create our progress effect.
Why not use the modern fetch API? At the time of writing, there isn't solid support for all major browsers regarding the progress indicator.
The onreadystatechange event handler will capture the server response and output it in an HTML element, but only if the status is complete.
All we have to do now is implemented server-side PHP code to handle the file uploads, which we will do in the next section.
6. Form Handling with PHP
Finally, we can implement server-side code to process the uploaded files and implement validation (optional).
6.1. Processing the Uploaded Files
Edit the upload.php file and add:
<?php
// Make sure the captured data exists
if (isset($_FILES['files']) && !empty($_FILES['files'])) {
    // Upload destination directory
    $upload_destination = 'uploads/';
    // Iterate all the files and move the temporary file to the new directory
    for ($i = 0; $i < count($_FILES['files']['tmp_name']); $i++) {
        // Add your validation here
        $file = $upload_destination . $_FILES['files']['name'][$i];
        // Move temporary files to new specified location
        move_uploaded_file($_FILES['files']['tmp_name'][$i], $file);
    }
    // Output response
    echo 'Upload Complete!';
}
?>
In the above code, we must check that files have been uploaded, which is where we can take advantage of the isset and empty functions. With both of these functions, we can ensure the upload data exists.
Did You Know? You can adjust the maximum file upload size by configuring the upload_max_filesize option in the php.ini file.
The $upload_destination variable is the directory that stores all our uploaded files. The directory must exist on your server for the files to upload. In addition, you might need to chmod the directory and give it the correct permissions.
If everything else checks out, iterate all the uploaded files and move them to the specified directory.
6.2. Implementing Validation
We can implement validation to prevent the end user from uploading specific file types. If validation is not essential to you, you can skip this section.
If we want to restrict the files to image types only, we can implement:
if (getimagesize($_FILES['files']['tmp_name'][$i]) === FALSE) {
	exit('Unsupported format! Please upload an image file!');
}
If we want to restrict files based on the metadata, we can add:
if (!preg_match('/video\/*/', $_FILES['files']['type'][$i])) {
	exit('Unsupported format! Please upload an video file!');
}
If we want to restrict the file size, we can implement:
if ($_FILES['files']['size'][$i] > 200000) {
	exit('Please upload a file less than 200KB!');
}
Take note: the file size is measured in bytes.
If we want to change the file name to a unique name, we can change the $file variable to the following:
$file = $upload_destination . md5(uniqid()) . '.' . end(explode('.', $_FILES['files']['name'][$i]));If you have any other suggestions in terms of validation, feel free to share them in the comments section below.
Conclusion
Hopefully, you get the gist and understand the basic fundamentals when developing a fully functional upload form interface with a progress bar.
If you've enjoyed reading this article, consider sharing it with the social buttons below and drop a comment in the comments section. Your feedback will encourage us to create more quality content!
Enjoy coding, and thanks for reading!
Skip the copy-pasting and get the complete, working project from this tutorial as a free ZIP with a setup guide included. Free for personal and commercial use.