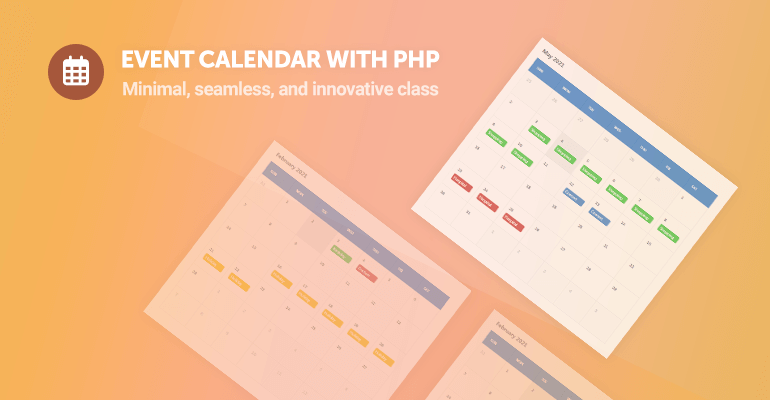
This article guides you through integrating a custom PHP event calendar class into your projects. In this tutorial, you'll learn how to build a dynamic calendar that automatically fills every day of a month and allows you to add custom events with ease.
Using PHP's built-in date and time functions, this calendar class remains lightweight and simple to integrate into any project — whether updating a personal blog or working on a large website.
For those who need even more advanced features, check out the advanced package that comes with extra functionality and a full download link for the source code.
Why Use This PHP Calendar Class?
If you're searching for a powerful yet flexible event calendar solution, this PHP calendar class is designed for you. I built it after extensive testing with various projects, and it fills the gap for a modern, dependency-free calendar that works seamlessly across different project sizes.
This lightweight class requires no extra libraries or extensions — just include it in your project and start managing events immediately.
Leveraging PHP's native date function, the class calculates the number of days in a month, identifies the first day of the week, and retrieves the last day of the previous month. This dynamic approach automatically populates your calendar, streamlining event scheduling and management.
Source Code
Create a new file called Calendar.php and add the following code:
<?php
class Calendar {

    private $active_year, $active_month, $active_day;
    private $events = [];

    public function __construct($date = null) {
        $this->active_year = $date != null ? date('Y', strtotime($date)) : date('Y');
        $this->active_month = $date != null ? date('m', strtotime($date)) : date('m');
        $this->active_day = $date != null ? date('d', strtotime($date)) : date('d');
    }

    public function add_event($txt, $date, $days = 1, $color = '') {
        $color = $color ? ' ' . $color : $color;
        $this->events[] = [$txt, $date, $days, $color];
    }

    public function __toString() {
        $num_days = date('t', strtotime($this->active_day . '-' . $this->active_month . '-' . $this->active_year));
        $num_days_last_month = date('j', strtotime('last day of previous month', strtotime($this->active_day . '-' . $this->active_month . '-' . $this->active_year)));
        $days = [0 => 'Sun', 1 => 'Mon', 2 => 'Tue', 3 => 'Wed', 4 => 'Thu', 5 => 'Fri', 6 => 'Sat'];
        $first_day_of_week = array_search(date('D', strtotime($this->active_year . '-' . $this->active_month . '-1')), $days);
        $html = '<div class="calendar">';
        $html .= '<div class="header">';
        $html .= '<div class="month-year">';
        $html .= date('F Y', strtotime($this->active_year . '-' . $this->active_month . '-' . $this->active_day));
        $html .= '</div>';
        $html .= '</div>';
        $html .= '<div class="days">';
        foreach ($days as $day) {
            $html .= '
                <div class="day_name">
                    ' . $day . '
                </div>
            ';
        }
        for ($i = $first_day_of_week; $i > 0; $i--) {
            $html .= '
                <div class="day_num ignore">
                    ' . ($num_days_last_month-$i+1) . '
                </div>
            ';
        }
        for ($i = 1; $i <= $num_days; $i++) {
            $selected = '';
            if ($i == $this->active_day) {
                $selected = ' selected';
            }
            $html .= '<div class="day_num' . $selected . '">';
            $html .= '<span>' . $i . '</span>';
            foreach ($this->events as $event) {
                for ($d = 0; $d <= ($event[2]-1); $d++) {
                    if (date('y-m-d', strtotime($this->active_year . '-' . $this->active_month . '-' . $i . ' -' . $d . ' day')) == date('y-m-d', strtotime($event[1]))) {
                        $html .= '<div class="event' . $event[3] . '">';
                        $html .= $event[0];
                        $html .= '</div>';
                    }
                }
            }
            $html .= '</div>';
        }
        for ($i = 1; $i <= (42-$num_days-max($first_day_of_week, 0)); $i++) {
            $html .= '
                <div class="day_num ignore">
                    ' . $i . '
                </div>
            ';
        }
        $html .= '</div>';
        $html .= '</div>';
        return $html;
    }

}
?>
Add the following code to your stylesheet (CSS) or create a new file called calendar.css:
.calendar {
    display: flex;
    flex-flow: column;
}
.calendar .header .month-year {
    font-size: 20px;
    font-weight: bold;
    color: #636e73;
    padding: 20px 0;
}
.calendar .days {
    display: flex;
    flex-flow: wrap;
}
.calendar .days .day_name {
    width: calc(100% / 7);
    border-right: 1px solid #2c7aca;
    padding: 20px;
    text-transform: uppercase;
    font-size: 12px;
    font-weight: bold;
    color: #818589;
    color: #fff;
    background-color: #448cd6;
}
.calendar .days .day_name:nth-child(7) {
    border: none;
}
.calendar .days .day_num {
    display: flex;
    flex-flow: column;
    width: calc(100% / 7);
    border-right: 1px solid #e6e9ea;
    border-bottom: 1px solid #e6e9ea;
    padding: 15px;
    font-weight: bold;
    color: #7c878d;
    cursor: pointer;
    min-height: 100px;
}
.calendar .days .day_num span {
    display: inline-flex;
    width: 30px;
    font-size: 14px;
}
.calendar .days .day_num .event {
    margin-top: 10px;
    font-weight: 500;
    font-size: 14px;
    padding: 3px 6px;
    border-radius: 4px;
    background-color: #f7c30d;
    color: #fff;
    word-wrap: break-word;
}
.calendar .days .day_num .event.green {
    background-color: #51ce57;
}
.calendar .days .day_num .event.blue {
    background-color: #518fce;
}
.calendar .days .day_num .event.red {
    background-color: #ce5151;
}
.calendar .days .day_num:nth-child(7n+1) {
    border-left: 1px solid #e6e9ea;
}
.calendar .days .day_num:hover {
    background-color: #fdfdfd;
}
.calendar .days .day_num.ignore {
    background-color: #fdfdfd;
    color: #ced2d4;
    cursor: inherit;
}
.calendar .days .day_num.selected {
    background-color: #f1f2f3;
    cursor: inherit;
}
How To Use
View the practical examples below on incorporating the event calendar into your projects.
Include the class in your project and create a new instance.
include 'Calendar.php';
$calendar = new Calendar();
We can specify a date while creating a new instance:
include 'Calendar.php';
$calendar = new Calendar('2024-05-12');
Add new events to the calendar:
$calendar->add_event('Holiday', '2024-05-14');We can specify the number of days the event should last by binding an additional value to the add_event method:
$calendar->add_event('Holiday', '2024-05-14', 7); // Event will last for 7 daysWe can also change the color:
$calendar->add_event('Holiday', '2024-05-14', 7, 'red');Only red, blue, and green will work (the default is orange). You can add more colors to the CSS file.
We can populate the calendar in HTML format with the following code:
echo $calendar;Example Code
Create a new file called example.php and add the following code:
<?php
include 'Calendar.php';
$calendar = new Calendar('2024-05-12');
$calendar->add_event('Birthday', '2024-05-03', 1, 'green');
$calendar->add_event('Doctors', '2024-05-04', 1, 'red');
$calendar->add_event('Holiday', '2024-05-16', 7);
?>
<!DOCTYPE html>
<html>
	<head>
		<meta charset="utf-8">
		<title>Event Calendar</title>
		<link href="style.css" rel="stylesheet" type="text/css">
		<link href="calendar.css" rel="stylesheet" type="text/css">
	</head>
	<body>
	    <nav class="navtop">
	    	<div>
	    		<h1>Event Calendar</h1>
	    	</div>
	    </nav>
		<div class="content home">
			<?=$calendar?>
		</div>
	</body>
</html>
The stylesheet (style.css) for our example page:
* {
    box-sizing: border-box;
    font-family: -apple-system, BlinkMacSystemFont, "segoe ui", roboto, oxygen, ubuntu, cantarell, "fira sans", "droid sans", "helvetica neue", Arial, sans-serif;
    font-size: 16px;
    -webkit-font-smoothing: antialiased;
    -moz-osx-font-smoothing: grayscale;
}
body {
    background-color: #FFFFFF;
    margin: 0;
}
.navtop {
    background-color: #3b4656;
    height: 60px;
    width: 100%;
    border: 0;
}
.navtop div {
    display: flex;
    margin: 0 auto;
    width: 800px;
    height: 100%;
}
.navtop div h1, .navtop div a {
    display: inline-flex;
    align-items: center;
}
.navtop div h1 {
    flex: 1;
    font-size: 24px;
    padding: 0;
    margin: 0;
    color: #ebedee;
    font-weight: normal;
}
.navtop div a {
    padding: 0 20px;
    text-decoration: none;
    color: #c4c8cc;
    font-weight: bold;
}
.navtop div a i {
    padding: 2px 8px 0 0;
}
.navtop div a:hover {
    color: #ebedee;
}
.content {
    width: 800px;
    margin: 0 auto;
}
.content h2 {
    margin: 0;
    padding: 25px 0;
    font-size: 22px;
    border-bottom: 1px solid #ebebeb;
    color: #666666;
}
And now, if we navigate to our example page, it will resemble the following:
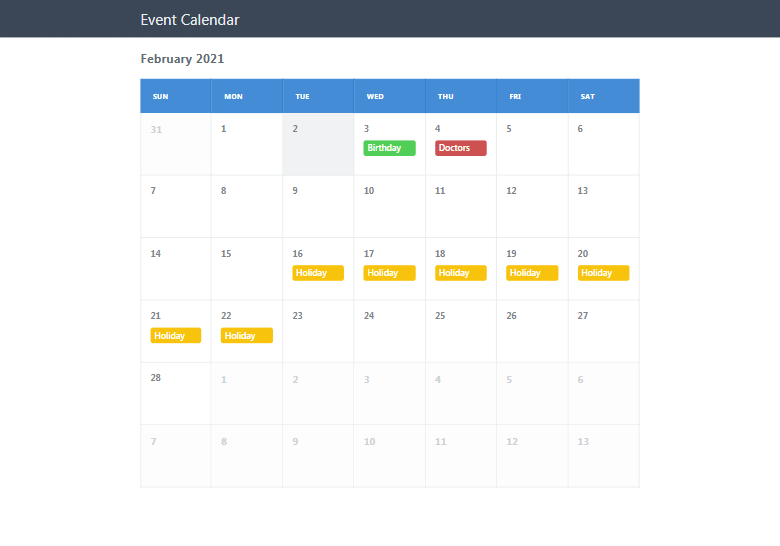
If no events are populated on the calendar, ensure the dates are correct and your server timezone is set correctly. You can change the timezone using the code below.
date_default_timezone_set('America/Los_Angeles');You can also change this setting directly in the php.ini file. The full list of supported timezones are available on the PHP site.
Frequently Asked Questions (FAQ)
Commonly asked questions for the event calendar system.
What is this PHP event calendar class?
This PHP event calendar class is a lightweight, dependency-free solution designed to help you integrate dynamic event scheduling into your projects. It automatically populates each day of a month based on a given date and allows you to easily add custom events.
Do I need any additional libraries or extensions?
No additional libraries or extensions are required. The class leverages PHP's built-in date and time functions, so you can simply include it in your project and start managing events immediately.
How do I add events to the calendar?
Events are added using the add_event method. You can specify the event's description, start date, and duration and even assign a color. The provided code examples in the article show exactly how to implement this.
Can I customize the look and feel of the calendar?
Yes, you can easily customize the calendar's appearance by modifying the accompanying CSS. Adjust the styles to match your website's design, or create your own stylesheet for further personalization.
How does the calendar handle time zones?
By default, the calendar uses the server's time zone. You can change the time zone using the date_default_timezone_set() function or update your server's php.ini file. For a complete list of supported time zones, check the PHP timezones page.
Conclusion
This PHP event calendar class is a great starting point for adding dynamic event scheduling to your projects. It offers a flexible, lightweight solution that you can easily customize to meet your needs—whether you're building a personal site or a large-scale web application.
If you run into any issues or have suggestions for improvement, please drop a comment below. We appreciate all feedback as it helps us create even better PHP development tutorials. Remember to follow us on social media and share this article if you found it helpful.
The code is released under the MIT License. When redistributing, kindly include my name and a link to this article, or consider using the advanced package, which doesn't require attribution.
Thanks for reading, and happy coding!
If you would like to support us, consider the advanced event calendar system below. It will greatly help us create more tutorials and keep our website up and running. The advanced package includes improved code and more features.